|
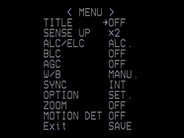
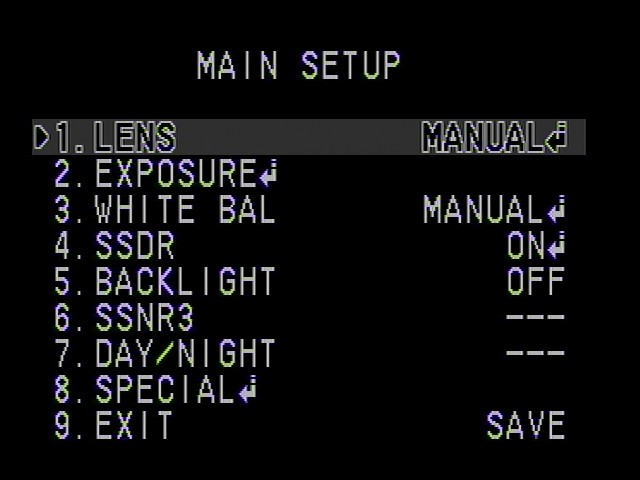
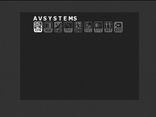
Just as there are many different analog video cameras, there are also many different camera menus. And, because all of the currently available analog cameras have their basis in security cameras, there are many functions in the menus which are not in the least relevant to use for deep sky astronomy. Both of these can confuse the heck out of someone new to the hobby and cause a frustrating first night with a new camera. 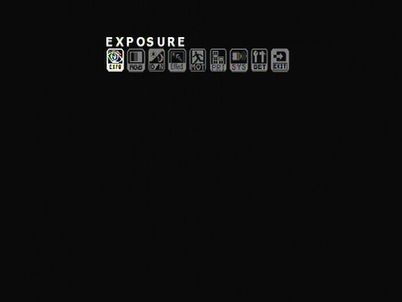 Fortunately though, many cameras in the Mallincam line (Jr, Jr Pro, Xtreme, X2, Xterminator) have the same menus. And, the MC Micro Ex, Super and the Lntech 300 have identical menus since they are based upon the same security camera (Lntech 300). Likewise, the AVS DSO-1 and MKIV cameras also share identical menus with each other, which are almost the same as the Lntech 300 as well. Even where the menus are decidedly different, like the Xtreme, and the Samsung, they all share most of the most important and common functions. This blog will concentrate on the menus of the Lntech 300 (MC Micro Ex & Super) and AVS DSO-1 & MKIV to help explain how to navigate through what initially may appear to be a complex and un-intuitive maze. Much of the discussion is still relevant to cameras like the Xtreme or Samsung, but the functions may have different names and may be located in different parts of the menu or sub-menu. First stop, the main menu page of the Lntech 300 which, as was said above, is identical to the MC Micro Ex and Super cameras and very similar to the AVS DSO-1 and MKIV. There are 9 main sections in this camera menu:
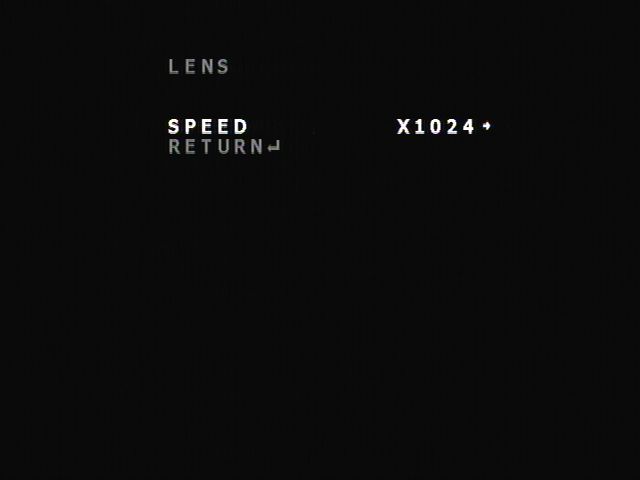
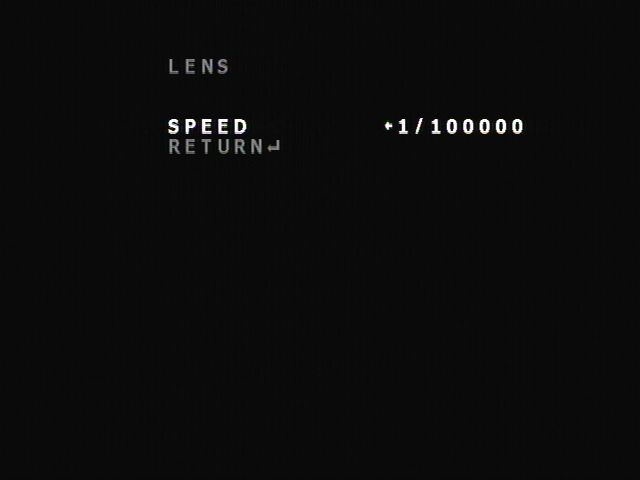
The title in parentheses shows the short-hand title at the bottom of each icon on the main menu page. Just to add to the possible confusion, these titles are not always the same. Also, AVS made some firmware changes to their cameras to add additional features which will be discussed below. They also used the title Procamp instead of Enhance for the System Icon and the title TSTBARS for the Privacy Icon. Nonetheless, they are the same menu items. Here is a quick run through of the Main Menu sections. Exposure: This is where the exposure time is set, the automatic gain control (AGC) is turned on or off, and the in-camera brightness control is set (not to be confused with the brightness control on a monitor or in the video capture device, if used). This section of the menu will be visited frequently. Color: This provides different ways to control the color balance of the camera (ATW, AWC, Manual, Push). You may choose to set this once and leave it alone, or adjust it with different sky conditions and filters or different DSOs. Day/Night: You will set this to "Day" and never need to change it unless you want to view images in Black and White. In that case, set it to "Night". Effect: This is another menu item which you likely will not visit frequently. It allows the image to be mirrored horizontally or vertically or rotated. This is helpful if you want to orient the image on your screen to match that in a sky chart. There also is a Sharpness adjustment (0 -49) which can be set once and mostly forgotten. Try something in the range of 10 -25 and see what you like. With the AVS cameras they also have a Freeze function to freeze an image, a Digitial Zoom from 1 to 10X and a Stabilizer function (I haven't played with the Stabilizer function so I am not sure what it does yet). These can be ignored until you have developed a good understanding of the other important camera features. Motion: For security camera applications, this is used to let the camera know that it should begin to record an image. This is not used for any of the Ln type cameras. For MC cameras with TEC such as the Xtreme and the X2, there is a function in the main menu called "Motion Detect" which when turned on activates the TEC. Privacy: For security cameras this is used to mask off different areas of the field of view. For astronomy it is not typically used except to make a set of video cross-hairs which are useful for mount alignment. You can find a description of how do set up the cross-hairs here. Enhance: Like Exposure, this is a menu section you will frequent. Here you can adjust Gamma, turn on in-camera stacking/averaging (if available) and set your display to CRT or LCD mode. System: There is only one feature here that you should ever attempt to change and that is the Title function, which allows you to overlay video titles on the frame. The Com ID and Baud Rate should not be changed from the camera defaults as they are set for the external control of the camera. If these are changed, you will not be able to communicate with the camera with a remote control if you have one. Also, do not change the language unless you can read Chinese characters. Snyc should be left set to Inter. Exit: This section of the menu is one of the places to save changes and exit the camera menu. Initialize will set the camera back to its default settings, but some have reported that they see no change when they tried this. So, for a beginner, you can simply focus on the Exposure, Color and Enhance menu items until you develop some skill with the camera. How does one navigate through the menu? Use the center center button of the 5 button camera control (or software emulator if using pc or BT control) to select a setting or menu item, or to pull up a sub-menu if that item has one. Use the Up/Down buttons to move up and down in the menu. Use the Left/Right buttons to change selection choices. At the bottom of each menu screen or sub-menu screen there is a choice to "Exit", "Exit and Save" or "Return". "Exit" exits that portion of the menu without saving any change you may have made. "Exit and Save" exits that portion of the menu but saves the changes you have made. "Return" returns you to a higher level of the menu while saving any changes you made. Now a little more detail about the most frequently used menu items. 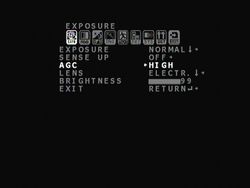 Exposure A normal person would think that you would set the length of the frame integration time by selecting the "Exposure" option which appears first in this menu section, but that is not the case. This should be set to "Normal" with only a few exceptions. The other choices here: BLC- Back light compensation, WDR- Wide Dynamic Range and HLI - Highlight Inversion are not relevant to deep sky video and can be ignored. "Sense Up" can also be used to control the length of the image exposure but will adjust other camera settings in an auto mode which is not preferable. For this reason, set "Sense Up" to OFF. "AGC" can be set to OFF, LOW, MEDIUM or HIGH. For AVS cameras, this will show up as OFF, 12dB, 28dB and 45dB. Higher AGC will increase the camera's gain, just like the ISO setting in a DSLR camera. This will bring out more detail with shorter exposures, but at the price of background noise. AGC can also cause the appearance of Amp Glow (another form of noise) in many cameras as well, but not all (like the AVS cameras and the Lntech 300 PAL). If you have an Alt-Az mount, or do not have a good polar alignment on your EQ mount, AGC can help avoid star trailing by keeping the exposure short and still bring out detail. On cameras with in-camera stacking/averaging like the Lntech 300, Micro, Super, DSO-1, MKI4 and APU-1, AGC must be on in order for the in-camera stacking/averaging function to work. "Lens" is where the length of the exposure can be adjusted. AVS cameras call this "Int" for Integration. Set this to "Electric" not "DC Iris". For deep sky objects, exposures (called Speed in Lntech and Micro, Super cameras, and Time in AVS cameras) are 2x, 4x, 8x, ... 1024X where each X is 1/60th of a second for NTSC cameras and 1/50th of a second for PAL cameras. So for an NTSC camera this range is 1/30th second to 17.07 seconds. For the Sun, Moon and planets there are exposures of 1/60th second to 1/100000 second. Do not use the Auto mode as it is used in conjunction with Sense Up. "Brightness" has a range of 0-99 and is not to be confused with the Brightness setting on a monitor or in the video capture software. This setting, along with the AGC setting determines how much gain the camera chooses. The Brightness is a threshold level, the higher it is set, the more gain at a given AGC setting. Setting this to a low value like 2 would effectively turn off the gain even if AGC is set to High. Setting it to 99 results in the maximum gain when AGC is turned on. 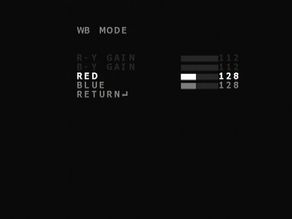 Color Here you can adjust the color settings to get the color you think most appropriate. There are four choices, AWB, ATW, Manual and PushX but only the first three are relevant to astronomy. Auto White Balance (AWB) adjusts to keep the color neutral. If there is too much of one color, it tries to reduce that. With ATW (Auto Tracing White Balance) the camera readjusts its white balance each time it detects a change in the ambient color temperature automatically. It works by assuming that the brightest parts of the scene are white objects and will try to correct these objects so that they appear white. Both of these have gain settings for Red and Blue adjustable over a wide range. Manual is just that. You set the Red and Blue levels to what you like. If you are using image capture software which has a histogram, you can adjust the Red and Blue levels so that the histogram colors line up. You can adjust the color settings once during the viewing session and forget about them. 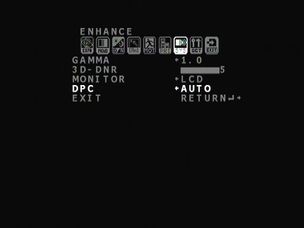 Enhance You may come here frequently to change Gamma and/or 3D-DNR. Gamma stretches the image allowing more detail to be visible but may tend to wash out the background sky. The nice thing about Gamma is that changes are visible immediately on the screen. The range is 1 (High) where there is no stretching to 0.3 (Low) with the maximum stretching. 3D-DNR has a range of 0 to 5. When set to N = 1 through 5 the camera will take that number of images and average them together to reduce noise. The averaging is done for each pixel over successive image frames (temporal averaging) and also for each pixel and the other pixels adjacent to it within a single frame (spatial averaging). Therefore, the higher N is set, the better the noise reduction. However, this means it will take N x Exposure setting to see the final image. So, if 3D-DNR is set to 5 and exposure is set to x1024 for a PAL camera, the final image will appear after 5 x 20sec = 100 sec. The Monitor setting needs to match the type of monitor used, LCD or CRT, and can be set once and left alone. Dead Pixel Averaging (DPC) eliminates dead pixels by averaging over adjacent pixels and should be set to Auto and left alone. 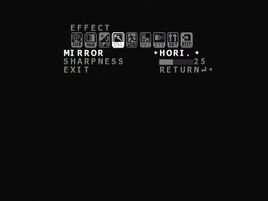 Day/Night As I said above, just set this to Day for color or Night for B&W and forget it. Effect You should visit this the first time you set up and set Sharpness to 20 and leave it there while you learn about the other menu items. Once you have those down, revisit and try different Sharpness values to see what you like best. Motion and Privacy Ignore these at first. Later you can add cross-hairs in the Privacy menu. System The only thing here you will want to adjust is Title to put titles on you image in case you are broadcasting on Night Sky Networks or want to save a picture with the label. But again, you will not use this while you are first learning how to work with the camera and can ignore it till later. You should not change any of the other settings located here. 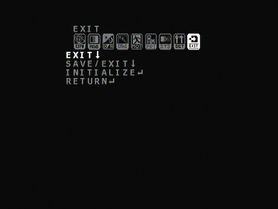 Exit Use this to save settings and exit the menu. You can also do that within the other top level menu sections. I hope this is helpful to anyone new to deep sky video or these particular cameras. While there are a lot of different menu features, it really only comes down to a small handful which are commonly changed within a single night. © 2015 Curtis V. Macchioni
1 Comment
|
Categories
All
Archives
January 2024
|
 RSS Feed