|
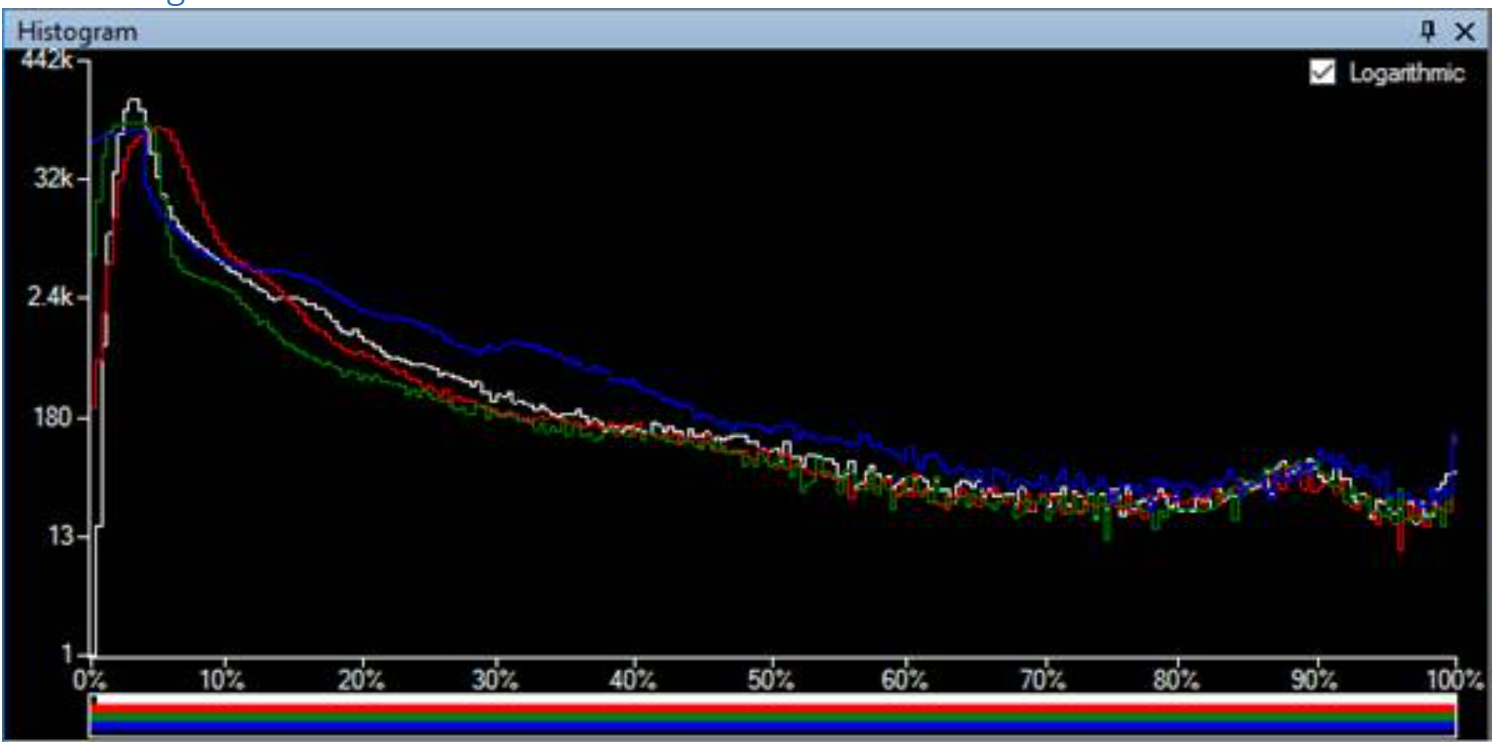
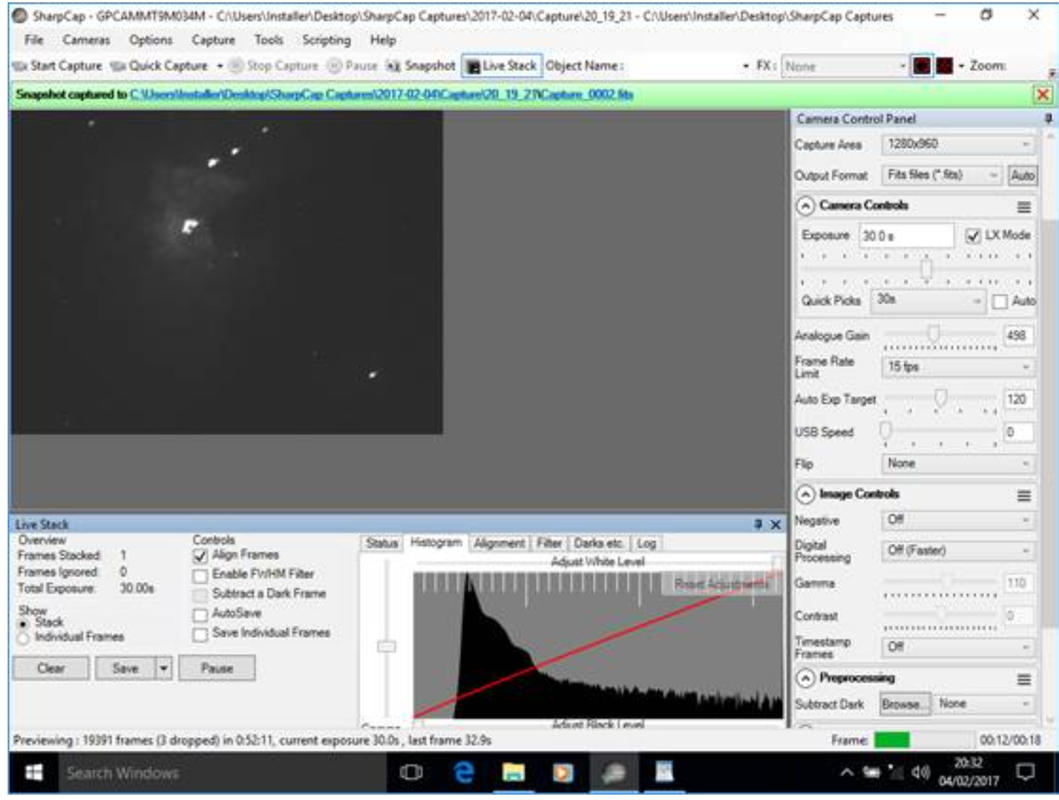
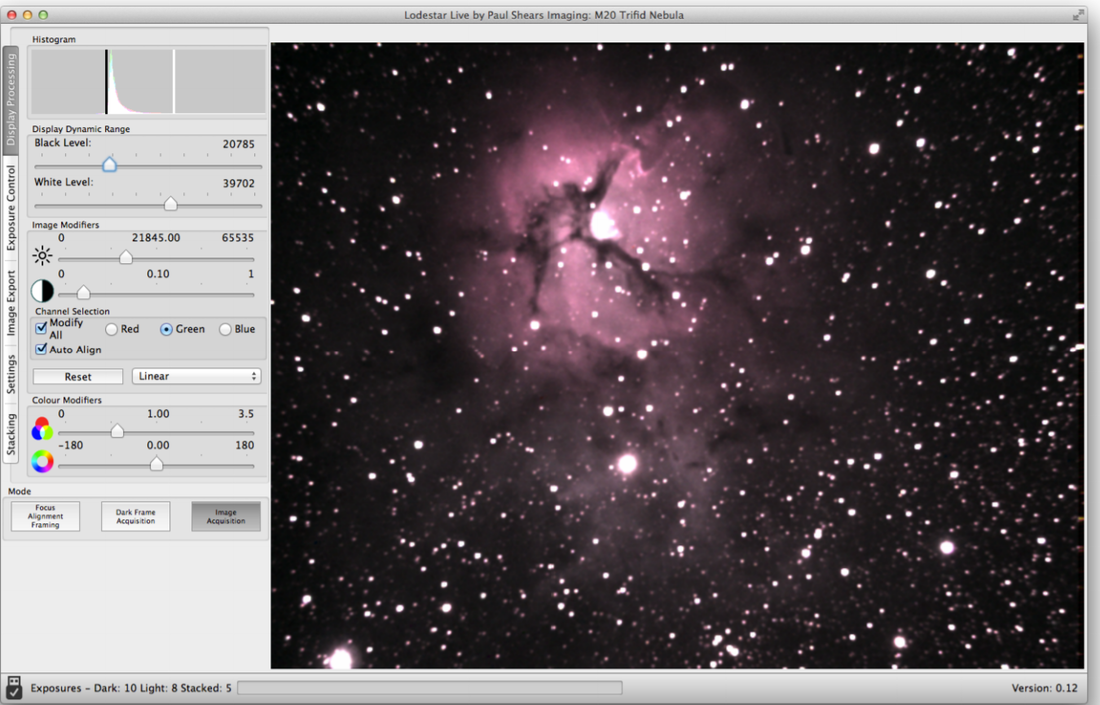
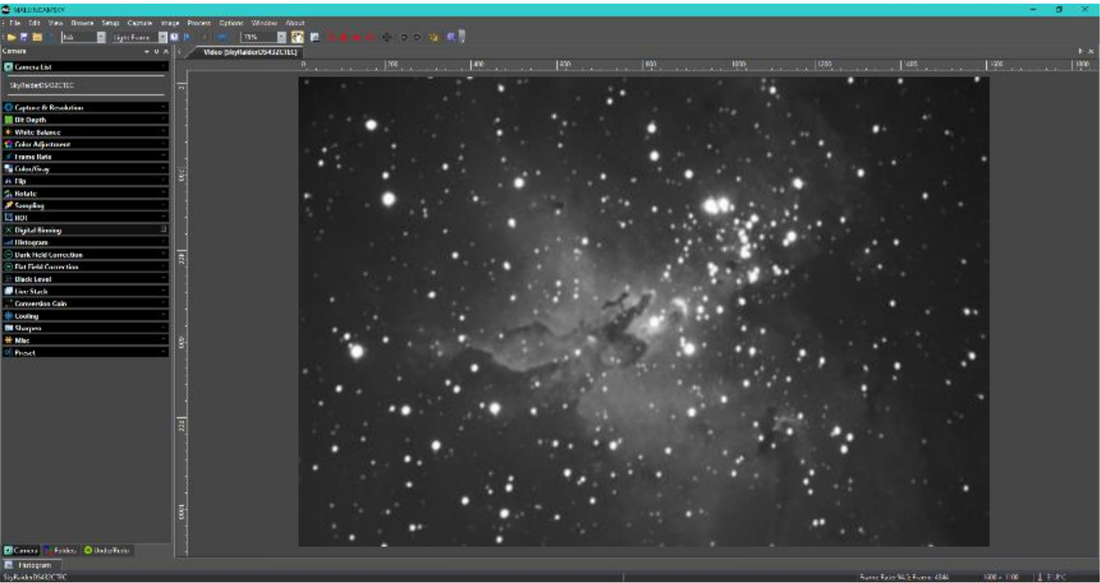
In this edition of my "EAA for Beginners" series we will discuss the different software available today for camera control and live image enhancement. The most commonly used ones are SharpCap, ASILive, Starlight Live, Infinity, ToupSky, MallincamSky, RisingSky and Miloslick. It is impossible to go through each of these in detail in a short artical like this. Complete details for each package can be found in its respective user manual. Instead, this will be an overview of the main features which are necessary or very useful for EAA followed by a brief discussion of some unique features of each specific software package without going into great detail on any of them. The objective is to give you the big picture so that you can zero in on one or two of the applications and do more detailed homework to decide which one is best for you. In a later edition, I will do an in depth review of SharpCap since that is one of the most used applications, the one with the most features, and the one I use most of the time. While I have also used Starlight Live and Miloslick I prefer SharpCap. 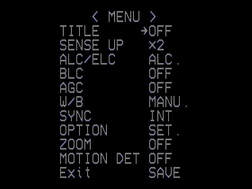 Mallincam Xtreme OSD Main Page Mallincam Xtreme OSD Main Page The First EAA Software In the earliest days of EAA with analog video cameras like those from Stellacam and Mallincam, camera settings were controlled by the On Screen Display (OSD) as shown in the picture below. To modify the settings, 5 tiny buttons on the back of the camera had to be engaged to navigate through the menu as one watched the OSD on a video monitor. This was very cumbersome for many reasons including the difficulty of manipulating the buttons in the dark and in the cold when wearing gloves. Eventually, wired hand controls became available but all these did was effectively move the buttons away from the back of the camera as far as the cable would reach. Useful, but still all the difficulties of buttons and an OSD. Also since these astronomy cameras were modified security cameras, navigating the OSD could be confusing as there were multiple pages and sub-pages with control settings designed and named for the cameras' original purpose, video surveillance, with names like "Sense Up", "ALC", "ELC", "BLC", "Sync", etc. Huh? Furthermore, the control software was designed to be set once and seldom, if ever, changed whereas for astronomy, the settings needed to be adjusted on the fly to optimize the view for each target object. Scrolling through screen after screen to find the parameter you needed to change using the tiny buttons was a pain! After a while folks like Stephane LaLonde and Steve Massey developed software for the Mallincam and GSTAR line of cameras with an astronomy minded user interface which translated the camera controls into much more friendly astronomy jargon and organization. This greatly simplified control of the camera settings while viewing images on a computer and changing settings from the computer but did nothing to allow the user to enhance the quality of images beyond the camera's native capabilities. One had to rely on camera exposure, gain, gamma, cooling and other features built into the camera itself to enhance live view images. 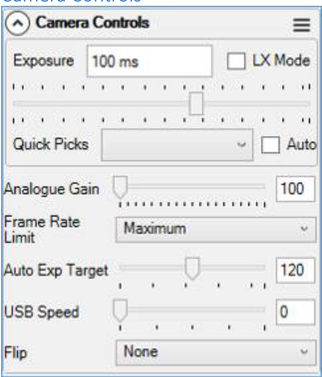 Camera Controls from the SharpCap manual Camera Controls from the SharpCap manual Today's EAA Software Today's EAA software consists of similar camera control capability like that in Stephane's and Steve's earlier software, but it also includes a wealth of live image enhancement features. There are many different software available today for use in EAA with most developed to work only with a specific brand of camera. These include software from ZWO (ASILive), Starlight Xpress (Starlight Live), Atik (Infinity), Mallincam Video Cameras (Miloslick), Touptek (ToupSky), Mallincam Digital Cameras (MallincamSky), and Risingcam (RisingSky). The most widely used software for EAA (also works well for traditional astrophotography) is SharpCap which is designed to work with most cameras on the market today. Today's software consists of two basic elements. First, there is the camera control element which enables adjustment of camera settings which, like Stephane's and Steve's earlier software, makes changing camera setting so much more user friendly, simple and quick. The second element which was missing from the earlier software includes live image stacking, dark frame subtraction, histograms, FWHM measurements, and much, much more. It was this second element which provided a revolution in EAA capabilities early last decade. We will go through the basic EAA software features below starting with camera setting controls. Camera Controls As mentioned above, for EAA the camera settings need to be adjusted depending upon the target object and the sky conditions so all of the applications mentioned above provide the ability to set and adjust all of the typical settings in cameras available today. First and foremost is the image exposure which, depending upon the camera, can be set from sub milli-seconds to infinity. The exposure progress is displayed showing the remaining time left before the image is displayed. Single images or a sequence of images can be viewed on a screen and/or captured to local storage. Images can be saved in a number of different file formats such as FITS, TIFF, JPEG, PNG, etc. Also, a video sequence can also be captured which is useful for lucky imaging of the planets. These are saved as AVI, SER etc. files. All cameras have a gain setting which can be increased to boost the sensitivity of the camera for a given exposure to bring out more detail, or reduced to minimize background noise. Typical cameras today have the ability to combine adjacent pixels into an effectively larger single pixel called binning. Binning increases sensitivity at the cost of resolution. Binning choices are 1 x 1 (native camera resolution), 2 x 2 (4 pixels), 3 x 3 (9 pixels) and 4 x 4 (16 pixels). Also, most cameras today come with the option of cooling the sensor with an internal Peltier cooler attached to or nearby the image sensor. Live Image Enhancement As we said above, the second element of software used for EAA is the ability to manipulate the image in real time which has led to a revolution in the quality and sophistication of EAA images which can now rival long exposure astrophotos. Each of the software packages used for EAA include the basic elements of live image enhancement. Let's go through each of these in a little detail Image Preview A preview of the latest image is shown on the monitor. As each exposure is taken, the latest image replaces the previous one. If stacking is turned on, the image refreshes with each new frame in the stack. The previewed image can be enhanced on the fly by using the white balance, brightness, contrast, saturation, hue adjustments, depending upon which are present. In addition, further image enhancements are possible through histogram controls discussed below. Image Stacking Among all of the technical advances in cameras and software, many would agree that live stacking has done more to enhance the ability of EAA than any of the others. Live stacking adds or averages any number of successive frames together, aligning them to the first frame by translating and rotating subsequent frames in software to align the stars in the image. Live stacking greatly improves the image viewed by reducing the noise and increasing the signal, since random noise from frame to frame is overwhelmed with the fixed signal content in each frame. This makes it possible to see spiral arms and dust lanes in galaxies and brings out faint nebulosity in planetary nebulae. Instead of having to capture many images for post processing the next day as in traditional astrophotography, one can watch the image improve before their eyes as each subsequent frame is added to the stack. Live stacking has made it possible to take and stack many very short exposures of a few seconds instead of taking a single long exposure of several minutes to bring out detail. Using short exposures means that one does not need a mount with high tracking accuracy. No does one need to do a very precise polar alignment as needed for astrophotography. Instead much less expensive mounts and even Alt-Az mounts are highly capable for EAA when live stacking is employed. Of course, there is a limit to the ability to adjust successive images to overlay the original frame if the polar alignment is way off or an exposure much longer than 30sec is used with an Alt-Az mount. Live stacking can only do so much. While all of the applications provide live stacking, they differ in stacking options which they may provide. These include stacking by Summing frames, Averaging frames, Sigma Clipping which discards frames with satellite or airplane trails, and FWHM filtering of frames which discards frames with bloated stars. Histogram The histogram is a graphical representation of the amount of light reaching each pixel. It shows the number of pixels on the vertical axis and the grey scale on the horizontal axis with completely black (no signal) on the far left and completely white (saturated pixels) on the far right. So each point on the histogram curve represents the number of pixels at each level of brightness. One can quickly see if the image is over-exposed as the curve will be shifted too far to the right. This means that stars will look bloated and detail is lost. On the other hand, one can also quickly determine if the image is under-exposed as the curve will be shifted too far to the left so that the background will appear grainy and faint detail will be lost. The ideal histogram will show space between the lower edge of the curve and the left axis and a long tail decreasing to the right. The histogram is a valuable tool which can be used to tease out an improved image live on the display screen. There will be 3 sliders shown at the bottom of the histogram for the black, mid and white level settings. The black slider at the lower left controls the position of the black point (pure black - zero signal) for the image. Moving to the right closer to the peak of the histogram darkens the background. Moving it too far to the right will clip data at the low end causing detail to be lost. The slider to the right controls the position of the white point (pure white - saturated signal). Moving it to the left brightens the image. Moving it too far overexposes the image. The mid point slide is used to stretch the grey scale linearly which helps to bring out faint detail. Some software, like ToupSky and Miloslick provide a feature called Curves, which allows the histogram to be stretched in a non-linear fashion. Curves provides more control over which parts of the image are darkened while others are lightened. Histogram sliders can be adjusted on the fly to improve the appearance of the image on the display in real time, but do not change the settings on the images being captured. Color Balance If a color camera is used the histogram will have one curve each for red, green and blue, whereas for a mono camera there will be a single luminance curve. The color can be balanced by manually adjusting the three histograms so that their peaks coincide. This can also be done in most applications automatically. Dark Frame Subtraction Image quality can be degraded due to noise coming from the camera itself in the form of hot pixels (defective pixels which are always on) and warm pixels (thermal noise). Noise can also come from the electronics in the form of amp glow which is thermal noise from camera amplifier circuits next to the image sensor. Dark frame subtraction is used to counteract these noise sources. A dark frame is taken with the telescope optics covered so that no light gets into the camera. It is important to take the dark frame with the exact same settings (exposure, gain, binning, cooling) as the image (light) frames. Although a single dark frame can be used, it is best to take multiple dark frames and average them together into a single master dark frame. 16 frames is considered a good compromise number of frames. Many who have a camera with cooling build a master dark library with different camera settings during times when they cannot observe (cloudy nights, daytime) so that they preserve precious time on good nights for observing. Flat Frames Some of the software applications allow for flat frames to be captured and used to scale subsequent image frames. Flat frames are commonly used in astrophotography to correct for differences in light intensity across the image plane. Without such correction images typically will appear brighter in the center and darker toward the outer edge of the frame, an effect called vignetting. Vignetting will be exacerbated when strong focal reduction is used. Flat frames are also valuable in eliminating the doughnut appearance from out of focus dust on the optical elements in the light path. Defective or Hot Pixel Removal Many of the software provide the capability to automatically detect defective and/or hot pixels. These are pixels that always appear black or pixels which always appear bright detracting from the overall view of the image. The application detects these pixels and averages the signal from the surrounding pixels so the pixel blends in. FWHM (Image Quality, Focus Tool) Several software provide information about the Full Width at Half Maximum (FWHM) of the stars. This is a mathematical measure of how many pixels a star covers. The less pixels the sharper the star appears. If a star covers too many pixels the stars appear bloated. This may simply be an indicator of too long of an exposure or of poor seeing due to momentary turbulence. The FWHM can be set to trigger an image to be captured only when the FWHM is below a set level. This is useful during live stacking so that only the images meeting the FWHM setting are stacked, improving the overall image quality. The FWHM measurement can also be used as a tool to focus the image. This is done by moving the focuser in and out while capturing the FWHM at several different focus points. Data for FWHM versus focuser position is collected and a curve its fit to the data. The best focus is defined at the point where the curve is at a minimum, i.e. the smallest FWHM and the tightest stars. Misc Controls A number of different features may or may not be available depending upon which software application is used. These include the ability to zoom into a region of the image to get a more detailed view. Image orientation is a feature to rotate or flip the image upside down or left to right which allows the viewer to correct the image orientation which may be reversed due to the type of telescope used. Several of the applications provide a selection of screen overlays such as a cross hairs or grids which can be viewed on top of the image. These can be quite useful for centering an image, performing a polar alignment and measuring separation of objects in the field of view. Overlays may also include text to help label the image and exposure details. Second Screen allows one to place a duplicate view of the image on another screen to be more easily viewed by additional people. 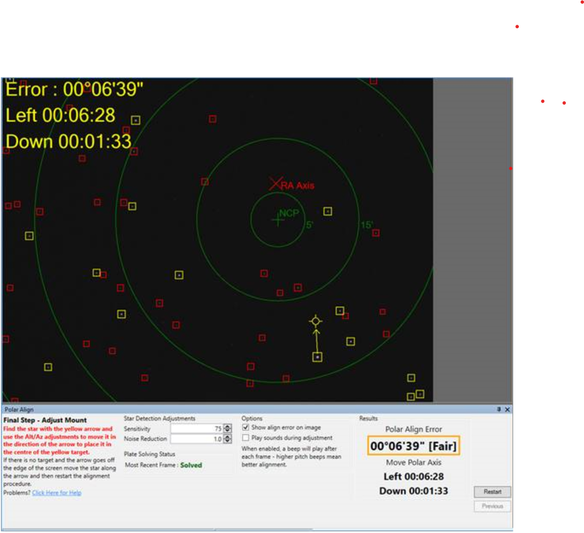 SharpCap Polar Alignment Window taken from the manual SharpCap Polar Alignment Window taken from the manual SharpCap In 2010, Robin Glover created a software program called Sharpcap to improve upon AmCap and similar Webcam viewing software. By 2012 he had modified SharpCap to work with video cameras commonly used for EAA. Not long after, he was among the first to add live stacking capability which immediately made SharpCap a hit with most everyone doing EAA. Today, SharpCap is probably the most used software for EAA, and also one that many astrophotographers use as well. Over the years Robin has added many helpful features to SharpCap which has led to the only complaint that I have heard raised about it. Because it is so feature rich, it presents a steep learning curve. But once mastered, useful features abound. SharpCap comes in two versions. There is a free version which contains all of the essential features for EAA and several extremely powerful additional features. The second version costs a mere ~$19 a year but includes quite a few unique features not available in other common EAA software. An extensive manual is available on Robin's website. SharpCap works natively with many cameras including those from ZWO, Atik, QHY, Starlight Xpress, Basler, Celestron and many more. Also, it works with other cameras which have an ASCOM driver. SharpCap provides support for Ascom focusers, filter wheels and mounts allowing them to be controlled directly from SharpCap rather than through additional SW applications. Before looking at the added features of the Pro version, lets look at some unique features of the free version. Many would agree that the capability to Plate Solve is key among these. With this, an image of the sky is taken and using one of four free Plate Solving tools in the background, SharpCap determines the actual coordinates at the center of the frame and moves the mount to center the telescope at the desired location. Plate Solving is a powerful tool to help located dim objects in the sky or to accurately return to a specific location. The free version of SharpCap also has a Sensor Analysis Tool which can automatically measure the read noise of your camera's sensor versus gain. Another useful unique feature is the ability to utilize one of 6 different Focus Aides including one for analyzing the diffraction image from a Bahtinov mask, another with single or multi-star FWHM analysis, and so on. The pay version of SharpCap adds some useful tools not available in the free version and also not available at this point in any other EAA software. First, it has a Polar Alignment tool which eliminates the need for another SW package or additional hardware to make an accurate polar alignment. Not only that, but the polar alignment routine is simple to use and fast. A Smart Histogram is also available with the pay version which, working with the Sensor Analysis tool, can determine the best exposure and gain to use for the specific sky conditions. The Sequence Planner is another powerful tool in the pay version which automates the process of collecting images allowing the user to set the Planner up and let SharpCap run in an automatic mode. This feature is more of an astro-imaging tool than an EAA tool, but is good to have if there is an interest to do some traditional astrophotography as well. 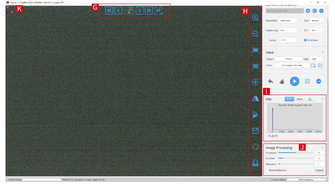 ASILive Main Window taken from the User Manual ASILive Main Window taken from the User Manual ASILive ASILive is free software from ZWO which only works with ZWO cameras. It is a sub-set of ASIStudio which includes applications for Planetary and Deep Sky imaging, along with a Deep Sky stacking application and a FITS viewer. ASILive is one of the few EAA software that work with Windows, MAC and Linux and iOS. A very limited ASILive manual is embedded in the Help section of the program. Due to the popularity of ZWOs cameras for EAA, ASILive is probably the 2nd most used application for EAA. It has almost all of the features described above and a few additional ones described here including the capability to remove the last frame from a stack using the "Undo Last Sub" command. This is useful if a satellite, plane or cloud passes through an image while live stacking. ASILive also adds Bias Frames to its ability to take Darks and Flats. And, since ASILive is fully integrated with ZWO hardware, it includes the Focuser and Filter Wheel Control for ZWOs own focuser and EFW filter wheel. Most ASILive users fully integrate with ZWO's platform including their ASIAIR hardware for complete camera and equipment control and power. 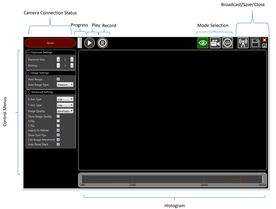 Infinity Main Window taken from the Manual Infinity Main Window taken from the Manual Infinity Atik's Infinity software is free to download from Atik's web site but only works with Atik cameras such as the Infinity and Horizon cameras. The manual can be downloaded from the Atik web site. The Infinity software is also works with Windows, MAC and Linux and iOS. It has most of the features discussed above but is noticeably lacking dark frame subtraction and flat frame scaling Infinity does have a few features which are unique. There is a Finder Mode designed to facilitate finding deep sky objects by using high gain and short exposures. Images will be noisy but once found, the user can switch to better settings. The Record and Replay Mode allows one to record every FITs image during a session which can be played back later for review or sharing. There is also a Live Broadcast mode which allows for broadcasting a session live view on YouTube or the Video Astronomy Live website. Starlight Live Starlight Live started out as Lodestar Live, a program created by Paul Shears to allow enhanced live viewing with Starlight Xpress' Lodestar camera. It eventually became part of Starlight Xpress and was renamed Starlight Live. It is free software which only works with SX cameras. At present there is a Lodestar Live manual which is the same as Starlight Live. In addition to most of the features outlined above, Starlight Live includes Non-Linear Stretching of the histogram that changes the contrast of the image, reducing the brighter regions like cores and enhancing the dimmer regions like the spiral arms of a galaxy. It lacks the ability to take Flat Frames. ToupSky, MallincamSky and RisingSky ToupTek is a Chinese company which makes cameras for a number of different applications, including astronomy. They make a line of cameras using the same Sony sensors as everyone else and sell them on AliXpress. ToupTek astronomy cameras have their very own free version of live stacking software that they call ToupSky. Mallincam and Risingcam work with ToupTek to produce cameras for themselves using the same Sony sensors. You will see a significant overlap in camera offerings among these three. Not surprisingly, Mallincam has its own free software called MallincamSky, while Risingcam has RisingSky. If you look carefully at the software manuals you will see that the software features are nearly identical to those in ToupSky, but each software only works with its parent camera supplier. All three of these applications are packed with the basic features described above for EAA along with a few additional features. ToupSky ( and possibly the other two) has Curves which is similar to histogram stretching but allows a continuous stretch along the entire histogram instead of just 3 points which can help to bring out more detail in an image They also include a Sharpen feature to sharpen fine details in an image. 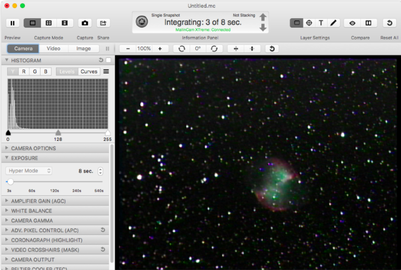 Miloslick Main Window taken from the manual Miloslick Main Window taken from the manual MiloSlick Mallincam Control Bill Koperwhats has developed software designed to work with Mallincam and some generic analog video cameras. Along with Robin's Sharpcap and Paul's Lodestar Live, Bill's software was one of the earliest providing camera stacking and histogram adjustments. It has evolved over the years and now has most of the features discussed above. MioslSlick works with Windows and MacOS. A manual is available on the Mallincam web site. MiloSlick also has a Curves adjustment feature with four adjustments points instead of just three. It also has the ability to Autodetect and Remove Hot Pixels. Frame stacking, however, is limited to no more than 10 frames. But frame stacking also allows for Rolling Frame Stacking which stacks the most recent frames and replaces the oldest frame with the newest in the stack. One of the more unique features of MiloSlick is its High Dynamic Range (HDR) Averaging. HDR allows the user to take images of different exposure times and stack them together into a single image which helps to retain detail in dark regions of an image while bringing out more detail in bright regions of the image. Without HDR viewers have to choose between "blowing out" the bright regions like the cores of galaxies in order to bring out detail in the spiral arms and dust lanes, or, the reverse. MiloSlick also has Sharpening and Smoothing algorithms to further enhance images. Summary
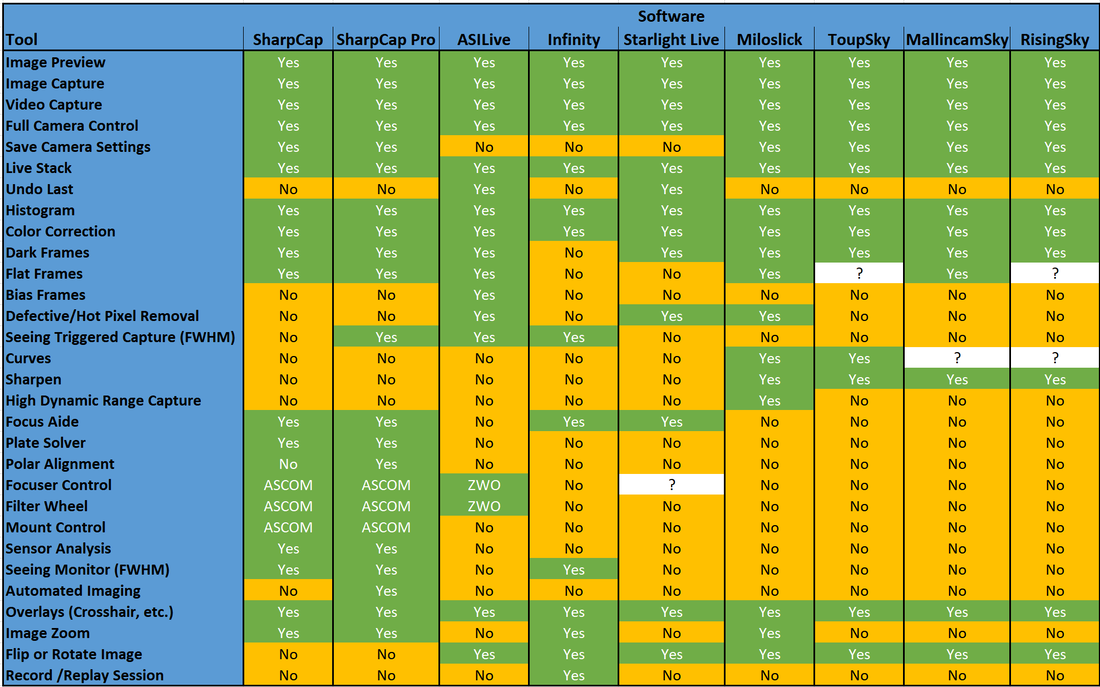
There are many good software packages which can be used for EAA. Several are also quite capable for traditional astrophotography as well. The decision as to which to use may come down to whose camera you have as most are designed specifically for particular cameras. Below is a table with a summary of most of the features found in EAA software. As it shows, SharpCap, especially the Pro version is the most feature rich which is why it tends to be the most commonly used. While the learning curve is steep, it has a good manual and there is lots of online support including on the SharpCap forum and from several YouTube tutorials.
0 Comments
|
Categories
All
Archives
January 2024
|
 RSS Feed