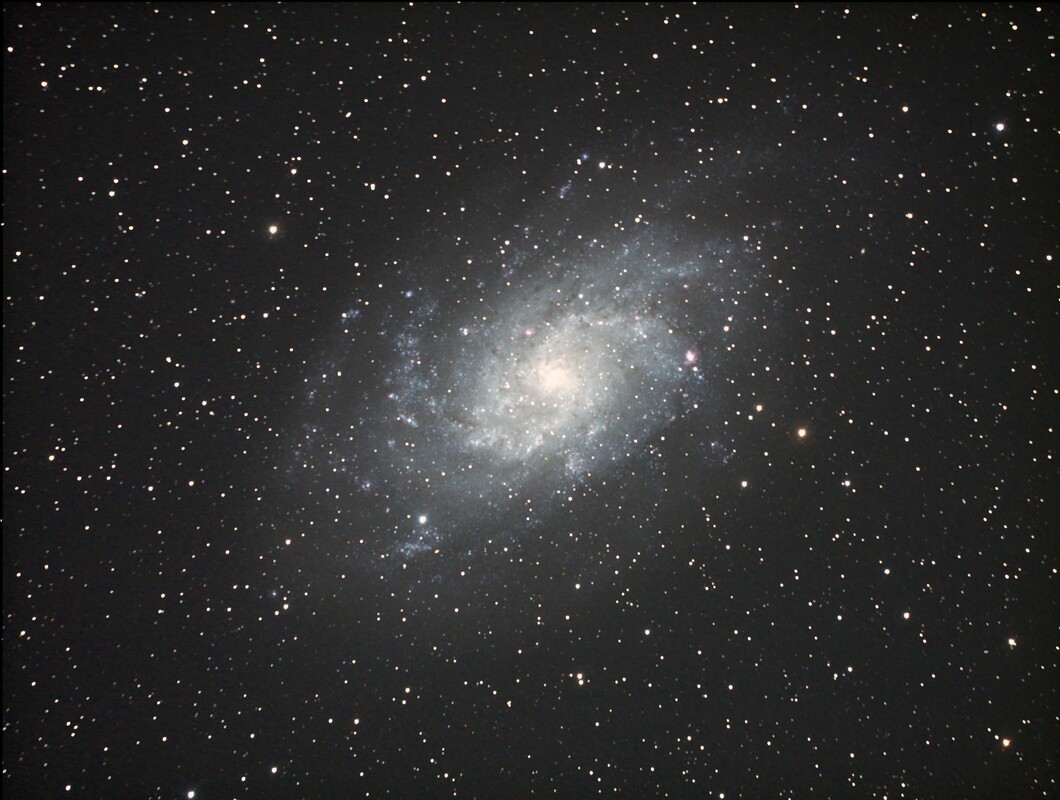
 M33 C14 Hyperstar ASI1600MC 77 x 60sec Gain 139 Stacked & Stretched in Nebulosity M33 C14 Hyperstar ASI1600MC 77 x 60sec Gain 139 Stacked & Stretched in Nebulosity Never Over-Tighten Your Hyperstar I used the Hyperstar almost exclusively on my C14" Edge telescope with great success for years. Then one time I found that the Hyperstar would not unscrew from the secondary holder. No matter what I tried the Hyperstar was firmly attached to the secondary holder threads and would not come off. In fact, the more I tried to entice the Hyperstar loose I only succeeded in making the secondary holder spin in the corrector plate. Oh boy! What now? I reached out to Dean at Starizona who was a great help in solving my problem. He explained that the gasket that Celestron uses between the inside of the corrector plate and the secondary holder does not have sufficient grip and slips if the Hyperstar is tightened too much, as it was in my case. The solution, remove the corrector plate to get access to the backside of the secondary holder to release the Hyperstar. Once done, just replace the original gasket with a stickier one from Starizona and re-assemble. Well I did that but apparently I did not get the corrector plate centered on the primary mirror as well as I should have. How did I know that? Just look at this image I took of M33 and you will see that the stars in the corners are elongated in the direction of center indicating a collimation problem. Adjusting the secondary using the three screws was not sufficient to improve the collimation since the problem was that the secondary was no longer centered on the primary mirror. I read on CN about a technique using the circular rings formed by the primary mirror, baffle tube, secondary mirror and corrector when you look down the center of the optical tube as a guide to getting the corrector plate centered. The objective is to adjust the corrector plate using the screws on the outside of the optical tube (for Edge only scopes) until the ring of the corrector plate is centered. I tried this but found it too difficult to maintain a steady enough line of sight down the center of the tube to be certain how much I needed to adjust the corrector. I even tried setting up my iPad on a tripod to photograph the set of rings as shown in a YouTube video. But even this was not very successful for me. Apparently, this method does work for many people, but it wasn't going to work for me. The moral of the story ... snug is good enough for the Hyperstar! 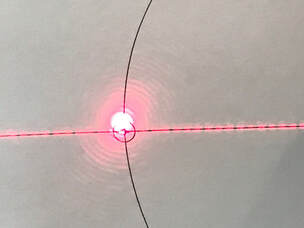 Before collimation of the CT collimator itself. Laser spot is off target slightly when reflected against a paper target as described in the CN blog. Before collimation of the CT collimator itself. Laser spot is off target slightly when reflected against a paper target as described in the CN blog. The HoTech Laser Collimator to the Rescue ... Not Quite Yet That led me to purchase a used HoTech Advanced CT Collimator on Cloudy Nights. The HoTech kit consists of a collimator plate, a Reflector Mirror with removable cap and a tripod adapter. There are four lasers on the back side of the collimator plate, one in the center and 3 at 120 degrees apart at a radius of several inches from the center. The laser in the center provides a cross-hair pattern for alignment of the plate to the telescope primary mirror. The 3 other laser provide parallel beams of light to simulate a distant star. The collimator plate has concentric alignment rings on its face for accurate collimation of the scope. The tripod adapter is used to attach the collimator plate to your own tripod and provides tilt of the collimator plate in two axes. The Reflector Mirror is inserted into the visual back or focuser to reflect the laser beams back to the collimator. If using the HoTech to collimate an SCT without Hyperstar this is all that is needed. When collimating with Hyperstar the optional Hyperstar upgrade kit is required as discussed below. Before attempting to use the CT Collimator I read a CN thread which indicated it was a good idea to check that the lasers on the collimator were themselves collimated before attempting to collimate the SCT. The thread provided a convenient method to do that using a paper target with a cross hair, a circle and 3 spots 120 degress apart where the lasers are positioned on the HoTech Collimator. The procedure is described here and works quite well. www.cloudynights.com/topic/647091-collimating-my-advance-ct-laser/?hl=%2Bcollimate+%2Bhotech+%2Bct#entry9088378 Using this method I came to the conclusion that one of my lasers was slightly off collimation. In principal, having found the offending laser I could adjust the laser myself to get it back in collimation. However, I was concerned that it was more likely that I might make it worse so I decided to send the collimator back to HoTech for adjustment. My only cost for the service was the postage. When I got the collimator back I set it up in my garage with the same paper target and verified that all three lasers were lined up where they should be. 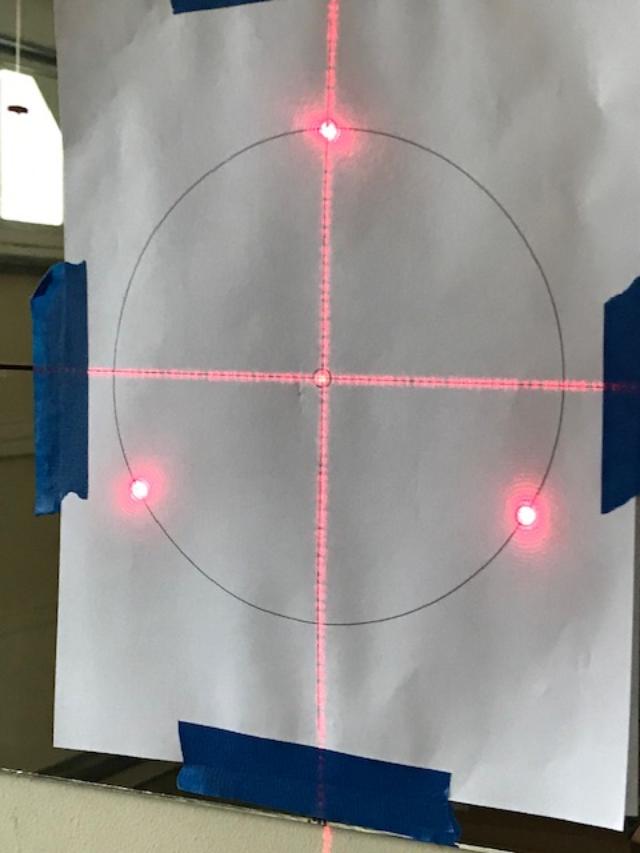 Cross hair and 3 laser beams reflected on the paper target showing perfect alignment after HoTech re-collimated the lasers. 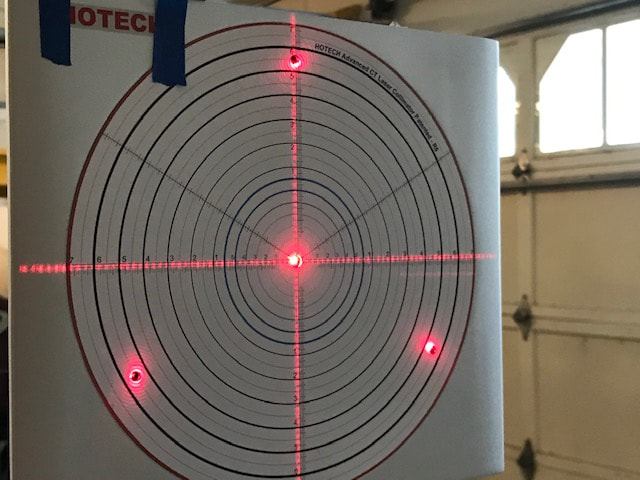 Using the mirror reflection method, the cross hair and 3 laser beams reflected back onto the collimator showing perfect alignment after HoTech collimation. The laser spot at the 4 O'Clock position is right on even if it looks slightly off in the picture which is an artifact of the off axis view. Using the mirror reflection method, the cross hair and 3 laser beams reflected back onto the collimator showing perfect alignment after HoTech collimation. The laser spot at the 4 O'Clock position is right on even if it looks slightly off in the picture which is an artifact of the off axis view. While waiting for my collimator to be aligned at HoTech I came up with another method to check the laser alignment using a small mirror instead of the paper target. Lining up the HoTech collimator 15 feet from the mirror and square to it enables the 3 laser spots to reflect off the mirror back onto the collimator. If the reflected laser spots all reflect back onto the lasers on the collimator, everything is in alignment. The advantage of this method is that the distance is effectively doubled providing greater precision. If you buy the HoTech Advanced CT collimator new you should not have this issue, but it is probably a good idea to check either using the paper target on the wall or the reflection from a good mirror. The originator of this CN blog insisted that I should not use a mirror as imperfections in the mirror would throw off the lasers. I understand that argument but if the reflected laser spots return to their origins as they obviously do in the image below after David at HoTech re-collimated the lasers, imperfections will not cause out of alignment lasers to appear in alignment. 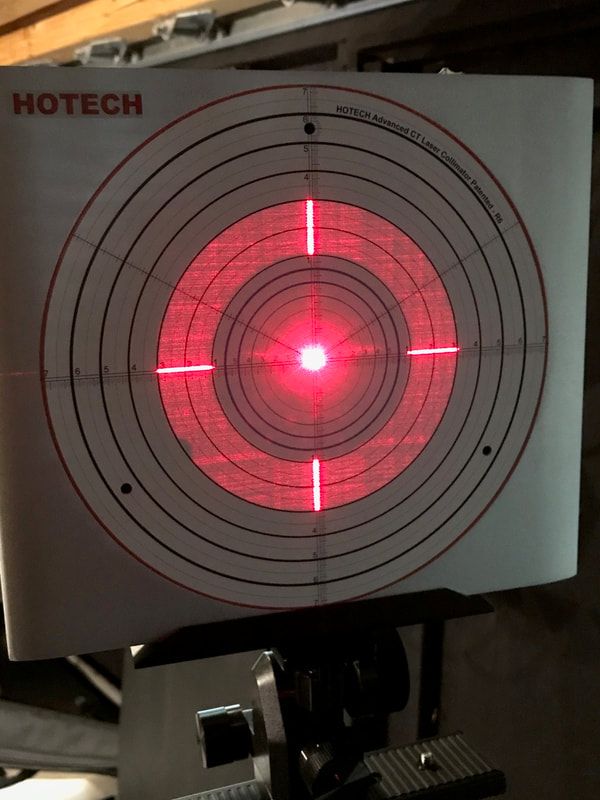 Both the cross hairs and the doughnut are visible. Both show alignment of the outer edges to one of the circles indicating co-planarity of the collimator to the primary mirror. The fact that the inner edges are also aligned to one of the circles means that the HyperStar (secondary) is centered on the primary. This image was taken on a brand new C11 Edge with perfect collimation. Both the cross hairs and the doughnut are visible. Both show alignment of the outer edges to one of the circles indicating co-planarity of the collimator to the primary mirror. The fact that the inner edges are also aligned to one of the circles means that the HyperStar (secondary) is centered on the primary. This image was taken on a brand new C11 Edge with perfect collimation. Mastering the HoTech Advanced CT Collimator Having certified that my collimator was in collimation I proceeded to the task at hand, to collimate my 14" SCT. Anyone who has used one of these will tell you that the initial step in the process is the most time consuming, tedious and most confusing step. And it is the most important step to get right. Once you get this done correctly, the rest is easy. Conceptually the first step is simple. Get the CT collimator plate in the same plane and on axis with the primary mirror. That is done by first attaching the HyperStar Reflector Mirror Assembly to the Hyperstar. The Assembly consists of an adapter ring, Reflector Mirror and a target cap. Next attach the collimator to a tripod with the included holder. The holder provides tilt adjustments along two axes which will be used to help align the collimator to the primary mirror. The following steps are performed with the collimator switched to Mode 1 using the center laser only to shine a cross hair pattern onto the telescope. Upon reflection from the primary mirror, this produces a clipped cross hair pattern on the collimator plate as seen in the image above. Next, adjust the height and distance of the collimator relative to the scope so that the cross hairs are centered and symmetric to one of the rings on the collimator. It is not necessary that the tips of the cross-hairs fall exactly onto one of the rings on the collimation plate, only that they be symmetric to the center of the plate. If the room is dark enough, you can also see a diffuse doughnut of red light from the laser collimator. Either the doughnut or the cross hairs can be used to do the alignment. Once either the cross hair or the doughnut is aligned, both will be aligned. I should note, that you will also move the telescope up and down or left and right to help align the collimator to the primary mirror. As the instructions say, repeat this process one or two more times but with smaller adjustments to get the alignment as spot on as possible. Also, it is best to set the collimator as far away from the front of the telescope as possible for higher precision. Typically it should be outside the Back Focal Length which is the point where the cross-hairs converge to a spot in the center of the collimator. You will notice that the inner edges of the cross hair (and doughnut) are clipped. This is due to the shadowing of the Hyperstar (or secondary). Likewise the outer edges of the cross hairs define the outer edges of the primary mirror. 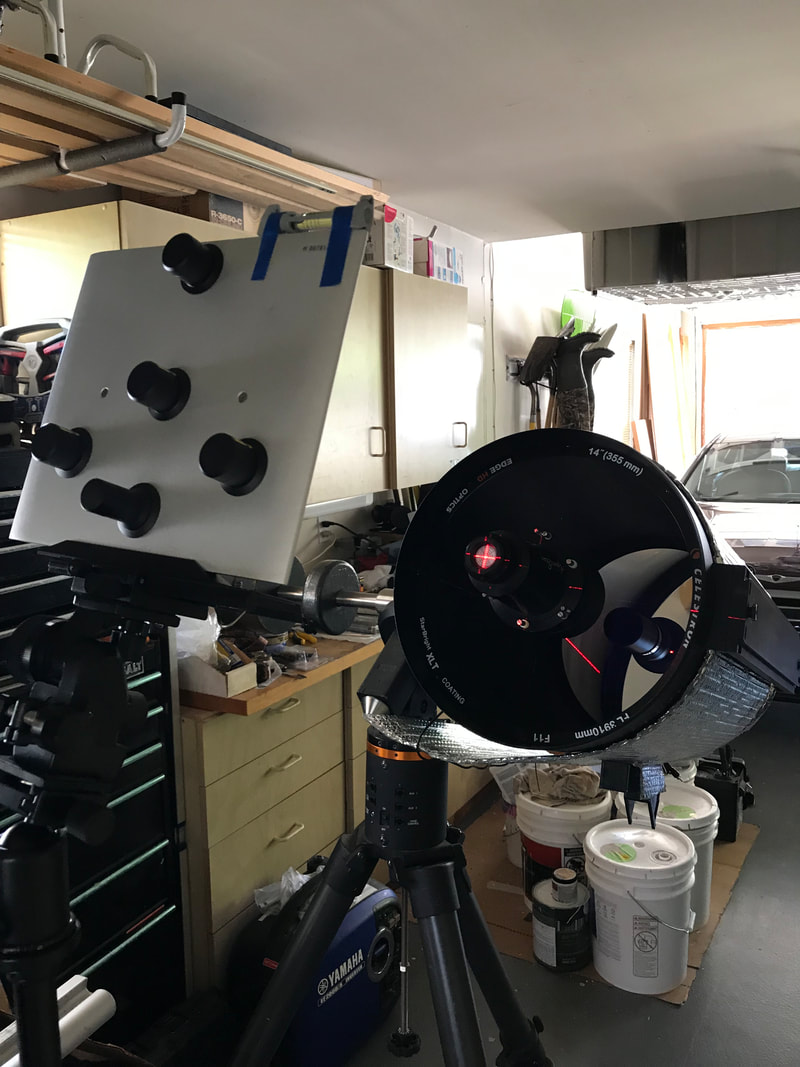 C14 with Hyperstar attached. You can see how the scope and Collimator are tilted at an angle to simulate actual star gazing conditions I should note that it is much better to do this process with the scope pointed upward, say 45 degrees, as it would be while observing. The weight of the mirror will cause a slight shift in position inside the optical tube when elevated which will change the collimation slightly if this procedure is done with the telescope pointing horizontally. I did this and found that unless you have a very tall tripod or a 8" and smaller SCT you will have to put the tripod on a table and tilt the collimator to the same angle as the scope. When set up like this, the process is even more confusing in terms of moving the tripod around to get co-planar alignment of the collimator and the mirror. But, eventually I succeeded. Having aligned the collimator plate to the primary mirror the hard part is done. You may have to re-check that you have not disturbed this alignment in later steps and re-adjust if needed. 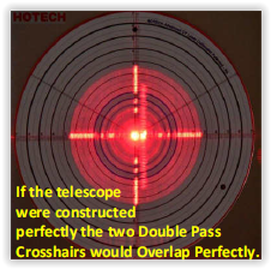 With the Reflector Mirror cap removed, a second cross-hair pattern is projected onto the collimator plate. The mis-alignment here indicates that the corrector plate is not centered. With the Reflector Mirror cap removed, a second cross-hair pattern is projected onto the collimator plate. The mis-alignment here indicates that the corrector plate is not centered. The next step is to make sure that the Hyperstar (or secondary if not using the Hyperstar) is centered on the primary mirror. Switch to Mode 2 which turns on the three lasers at 120 degree angles around the collimator plate. This creates three laser spots on the Reflector mirror target cap. Adjust the telescope focuser until all three dots converge into a single dot. If three spots are not all visible on the Reflector mirror target cap you will have to go back one step to realign the collimator to the primary mirror. Next, remove the Reflector mirror cap to allow a second smaller cross hair pattern to reflect from the Reflector mirror onto the corrector plate. This cross hair shows the tilt angle of the Hyperstar focal plane to the primary mirror. Adjust the push-pull pins on the Hyperstar to center this cross hair on the corrector plate. 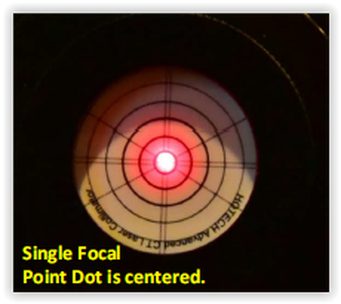 3 Laser dots on the Reflector Mirror cap aligned into a single dot. 3 Laser dots on the Reflector Mirror cap aligned into a single dot. The last step is to center the Hyperstar on the optical axis of the primary optical axis. Put the Reflector mirror cap back onto the Reflector mirror. The three laser spots should still be converged into a single spot. Next, this spot needs to be centered on the Reflector mirror cap. This is done on an Edge by loosening the screws on the front of the optical tube which hold the corrector retaining ring in place and then making use of the 3 adjustment screws on the outside of the optical tube to center the inner edges of the cross hairs on the same circle. If you do not have an Edge, you have to adjust the corrector manually until the secondary is properly centered. This completes the collimation process with the HoTech Advanced CT Collimator. The final step is to do a star test on a night with good seeing. Minor adjustments of the Hyperstar push-pull pins may be necessary to fine tune the collimation using the standard procedure for star collimation. When not using the Hyperstar, the process to align and center the secondary is different but is detailed in the HoTech Collimation manual and YouTube video which can be found in the links listed below. Also, when not using the Hyperstar, there is the added step of aligning the focuser to the optical axis. This procedure requires that the Reflecting Mirror supplied with the collimator be installed in the focuser and the secondary mirror removed so that a second cross hair pattern reflected by the Reflecting Mirror appears on the collimator screen. When this cross hair is centered on the collimator plate by adjusting the appropriate screws on the focuser, the optical alignment is complete. . 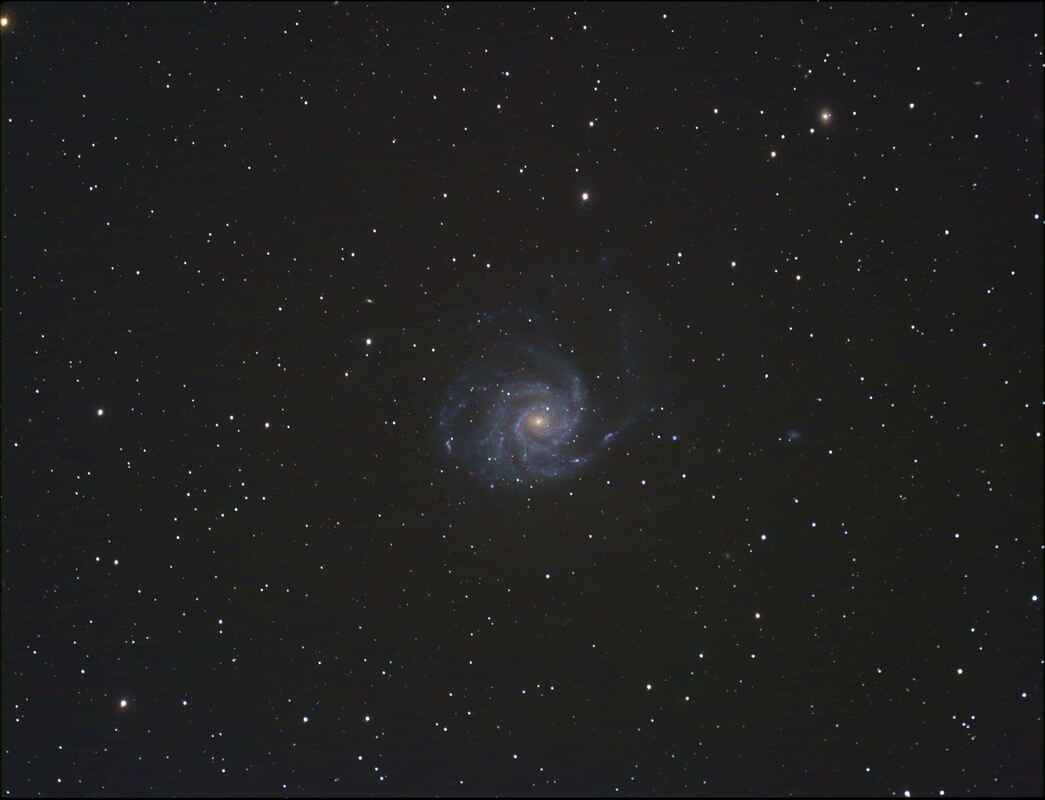 M101 116 x 30sec 200 Gain. Stacked and stretched in Nebulosity M101 116 x 30sec 200 Gain. Stacked and stretched in Nebulosity Collimation Confirmation
The final proof of good collimation was obtained by taking an image with the Hyperstar of a galaxy with lots of stars visible out to the edges of the field of view. Since much time had passed since I had imaged M33 to discover my collimation problem, it was no longer visible. So M101 was chosen as the test target since the FOV of the image has plenty of stars out to the edge to check for coma. As you can see in the image below, the stars are much improved at the four corners indicating much better collimation. While the HoTech Advanced CT Collimator is both expensive and requires a steep learning curve, it works extremely well allowing collimation during the day time or on a cloudy night. Unlike a star test, it also provides the ability to check the centering of the Hyperstar (secondary) and the alignment of the focuser to the optical axis of the primary, both of which can cause problems with star shapes when they are out of alignment. If you choose to use the CT Collimator, remember to be patient the first time you do it and use the helpful documentation in the links below. Good luck! If you are interested in the HoTech CT Collimator you can find it here. Make sure you get the right : HoTech CT Laser Collimator - 2" collimator with accessories HoTech CT Laser Collimator - 1.25" collimator with accessories 1.25" Reflector Mirror - separate mirror for a 1.25" opening 2" Reflector Mirror - separate mirror for a 2" opening OPT links are Affiliate links. Helpful Links HoTech has made a very helpful video which shows each step of the collimation process but with the secondary mirror in place, not the Hyperstar. It can be found here: www.youtube.com/watch?v=4BDwa0RVZw0 The complete written collimation instructions with illustrations, for both the Hyperstar and non-Hyperstar setups can be found on the "Helpful Links" page of this web site. There is also a CN thread showing a clever homemade jig to help make the collimation process easier which can be found here: www.cloudynights.com/topic/697589-learnings-from-using-hotech-laser-collimator-with-edgehd-scope/?hl=hotech+ct+collimator
1 Comment
|
Categories
All
Archives
January 2024
|
 RSS Feed