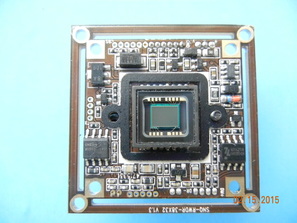
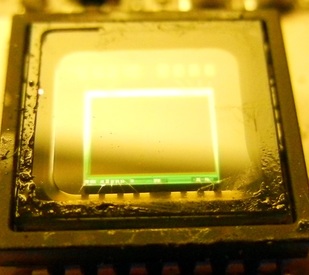
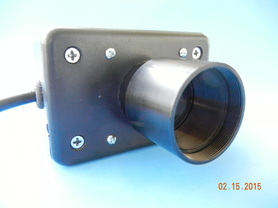
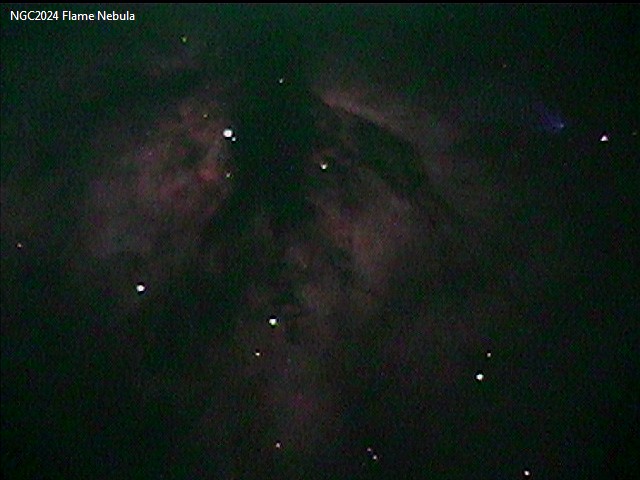
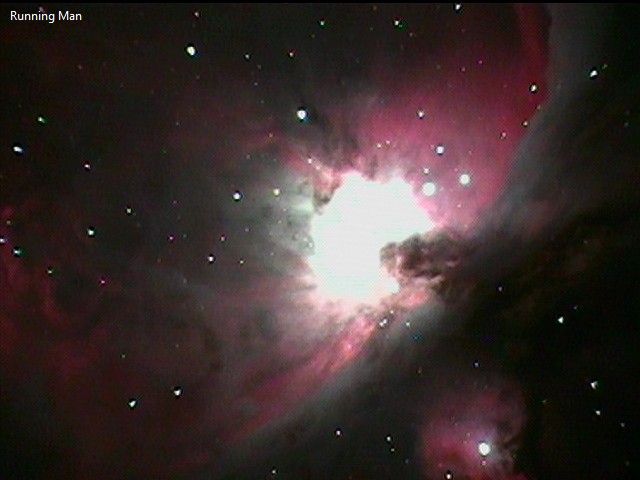
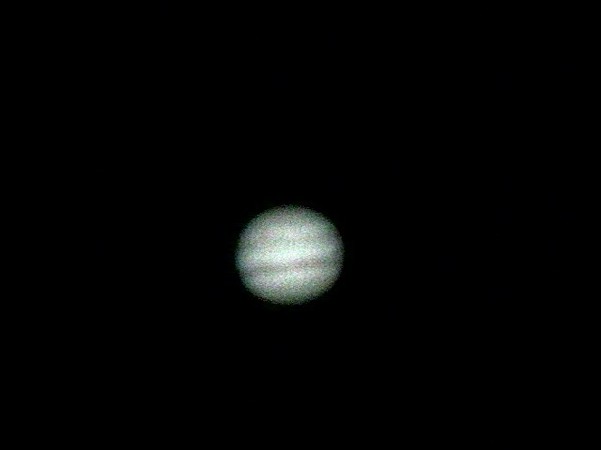
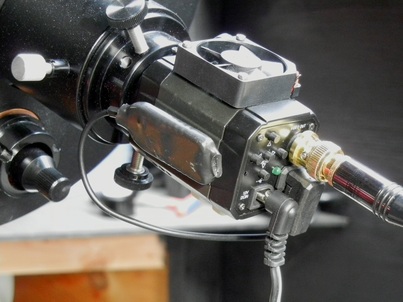
 I have to give credit for this discovery to "Photo444" and "DavidB in NM" who first suggested it in a post on the Cloudy Nights (CN) EAA forum in Jan 2015. You can find that discussion here. I bought a board camera myself soon after the initial posts for only $23 from Securitycamera2000.com which included free shipping. With it I built my own deep sky video camera for $35 which provides surprisingly good images. What is a board camera, you ask? With video security camera use on the rise it is now possible to buy the electronic board which has the CCD, Digital Signal Processor (DSP), and other electronic components without the external housing at one-third to one-half the price of a low cost security camera. You add your own custom housing and there you have a DIY camera ready for deep sky video. The board camera pictured above shows the CDD, a 1/3" Sony ICX638 NTSC Super HAD II. It has 768 x 494 effective pixels measuring 6.35 x 7.40 microns. The reverse side of the board has an RJ10 Digital Signal Processor (DSP), 10bit A/D converter, additional electronic components and connectors for camera control, power and video output. 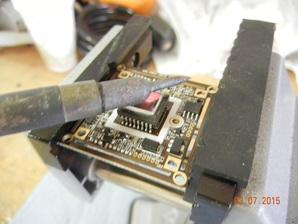 The board camera comes with everything you need to build your own video camera except the enclosure. Along with the 1.5" x 1.5" circuit board there is a 30" cable with connections for power (red) and video (yellow) and a 5 button in-line toggle switch to control the On Screen Display (OSD) for the camera's menu. One end of the cable has connectors which attach to sockets on the back of the board for power, video and camera control. The other end of the cable attaches to your video display (requires a BNC to RCA adapter) and 12VDC power (requires a 2.1 x 5.5mm power connection). It also includes a CS Mount Base to attach a C-Mount adapter or focal reducer, an S Mount Base (also called M12 Mount) to attach optional plastic wide angle lenses, two gaskets and some screws to attach the adapters to the board. The first thing you will need to do is to remove the IR filter which is glued onto the front glass of the CCD. This filter will block the all-important hydrogen alpha light from galaxies and nebulae if it is left in place making it much less sensitive. Removing the filter requires heating the top of the IR filter with a soldering iron until the filter slides off. The process will be easier if you hold the board in a vice. I used a 40watt iron, others reported success with a 30watt iron. The trick is to hold the barrel of the iron against the filter and not the tip as pictured. It should take 20 - 30 seconds to free the filter. I will admit, it took me several tries as I initially used the tip of the soldering iron, not the barrel. I also tried to grip the filter with needle nose pliers and ended up cracking the filter. None the less, I finally got the IR filter off without damaging the CCD. Once removed, you will have some residual optical cement on the glass which covers the CCD. This can be removed with a Q-tip and some alcohol. 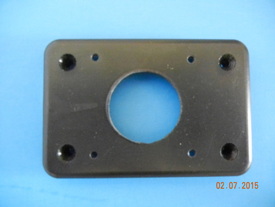 Next, you need to decide what type of enclosure to use for the camera. In the CN link above, one person machined a very nice cylindrical enclosure made out of delrin. Most, like myself, used a plastic hobby box. I chose to use a 3" x 2" x 1" hobby box that I bought from Radio Shack for $3.80. I drilled a 1" diameter hole in the center of the lid of the box to provide an opening for the CS Mount to fit through. I also drilled 4 smaller holes centered on the 1" hole for screws to attach the board camera to the lid of the enclosure. I made one last hole in the side of the box and added a rubber grommet for the cable to pass through. 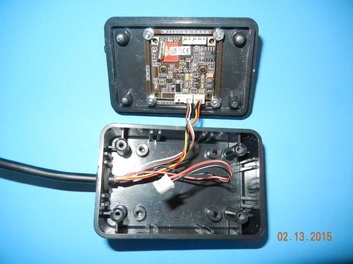 The next step is to attach the board to the front of the box. For this, I used long screws through the front cover of the hobby box and through the 4 holes at the corners of the board. Nuts on both sides of the board were used to hold it in place and to get the desired spacing of the CCD from the front of the 1" opening. After that, the CS Mount adapter needs to be attached to the board through the 1" opening using the included gasket and screws. Then feed the through the opening in the side of the base of the box and connect the power and video wires to their respective connectors on the back of the board. One of the three sets of wires will not be used as this is intended to control the Iris of a lens attached to the front of the camera which is not used for astronomy. Once that is done, you can attach the top of the box with the included four screws. Finally, I attached a C-Mount to 1.25" adapter to the CS mount and I was ready to go. The final cost, including hardware to attach the camera to the box was just under $35. Obviously, you can customize this any way you want. One person even added a fan on the back of the hobby box to cool the CCD. For most deep sky objects you will need a focal reducer which can be attached to the front of the 1.25" adapter. 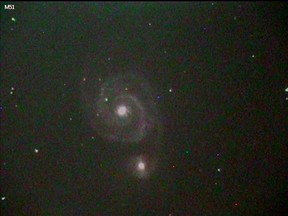 So how does the camera work? Surprisingly well. I tried out the camera on the back of my 9.25" SCT with a 0.5X focal reducer that I bought on Ebay from China for $25 (which included a C-Mount to 1.25" adapter) for a focal length of f/5. The images shown here are from my suburban backyard. I was easily able to capture images of several galaxies (M51, M81, M82 and NGC2403) with exposures ranging from 8.5 to 17sec. The maximum exposure for this camera is 17sec. I also was able to capture images of M1 and NGC2024 (Flame Nebula) with 17sec exposures. M42 was even easier to capture because it is so bright that it only took 4.2sec to get a very colorful image. To show how versatile the camera is, using a 2.5X Powermate from Televue, I was able to capture the Great Red Spot and bands of Jupiter with a 2ms exposure - I'm sure that if I captured and stacked multiple images it would look much, much better. I would say, for anyone who likes DIY projects and wants to try out video astronomy on the cheap, this would be the way to go. The camera can be used to replace your EP, but it can also be used on a finder scope or even, as some have reported, as a guider. Unfortunately, this particular board camera has been sold old and appears to no longer be available from SC2000. However, AVS offers a version of this same board camera but with the addition of a second circuit board with power and video connectors along with some additional hardware for $39.99. It can be found here: http://www.astro-video.com/diy-camera-module-board.html. In the meantime, keep looking on the CN forum for the next big discovery for DIY astro-video cameras. © 2015 Curtis V. Macchioni
4 Comments
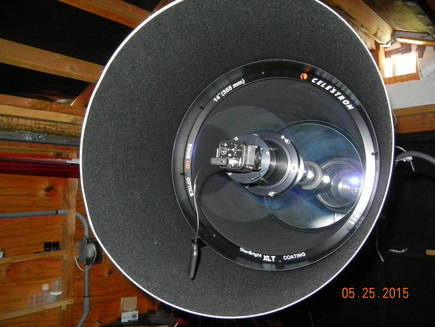
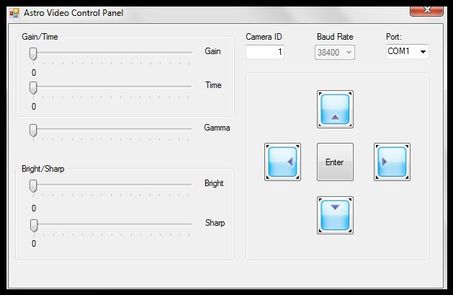
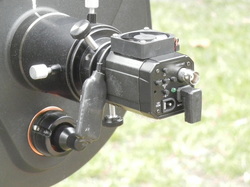 Having to deal with multiple cables running to the video camera can be a pain. One each for power, video and camera control. Plus, you may have others for control of the mount, focuser and guide scope. Now there is a way to get rid of one of these cables, the camera control cable, at least with some cameras. Astro-Video Systems introduced optional Bluetooth (BT) control for two of its astronomy cameras, the DSO and the MKIV this year. The BT adapter is available as a package or sold separately for $59. To control the camera with BT, just down load either the Android or PC application from the files section of the AVS Yahoo group. According the Matt at AVS, the Android BT application will work with an Android phone or tablet running Android v2.3 or higher. Unfortunately, at this time it cannot be controlled with iPhones or tablets. It is supposed to have a range of 100ft, but I can only verify that I have had it working at 40-50ft with success. The adapter connects to the "Auto Iris" port on the back of the camera. The receiver/transmitter portion of the BT adapter can be attached to the camera body with Velcro or an elastic band. This is ideal for Hyperstar or Fastar applications on an SCT. That way only the power and video out cables need to run across the field of view. The picture below shows the BT cable dangling, but in actual use I secure it to the camera body so it does not block any incoming light. I do notice that in the Hyperstar position, the metal dew shield can reduce the effect range of the BT signal if the scope and camera are pointed away from me. 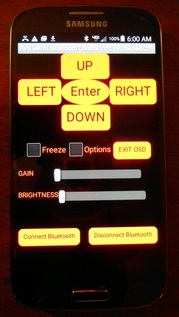 I have used the Android application extensively on my Samsung Galaxy S4 phone and have found it to be much better than using a wired PC control. The Android application was written by Charles C, who often posts on the EAA forum on Cloudy Nights. It emulates the 5 buttons on the back of the camera, which means you will still need to see the On Screen Display (OSD) on your monitor to know where you are in the menu. In addition, the MKIV application has sliders to control the Gain (this is not the AGC which must be controlled through the camera menu) and Brightness control sliders . It also has a Freeze frame button and an Exit OSD button. The DSO cameras do not have these additional function buttons since the camera firmware and hardware does not support these features. The Exit OSD button allows one to save all the changes made in the camera menu and exit the OSD with the touch of a single button. This eliminates the need to scroll down to the EXIT/RETURN/SAVE&EXIT command. It also saves and exits without clearing the camera video memory, allowing operation to resume from where it left without interruption after changes were made. Using the SAVE&EXIT command from inside the OSD "flushes all camera video memory buffers and may also trigger some protection circuitry , which leads to a white screen and having to wait for up to 3 minutes to fill up the video buffers again and display a new image". 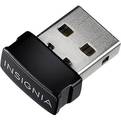 BT remote control can also be used with a pc. If your computer is not already BT ready, you can purchase an external BT adapter like the one I got from Best Buy for less than $25. The PC application also emulates the 5 camera buttons so that you can change the camera settings while watching the OSD on your computer monitor. It is also possible to modify cameras like the Lntech 300 and Mallincam Micro to add BT capability. You can read Charles C's post on CN here to find out how to make the modification. Be forewarned, if you modify the camera you will void the manufacturer's warranty.
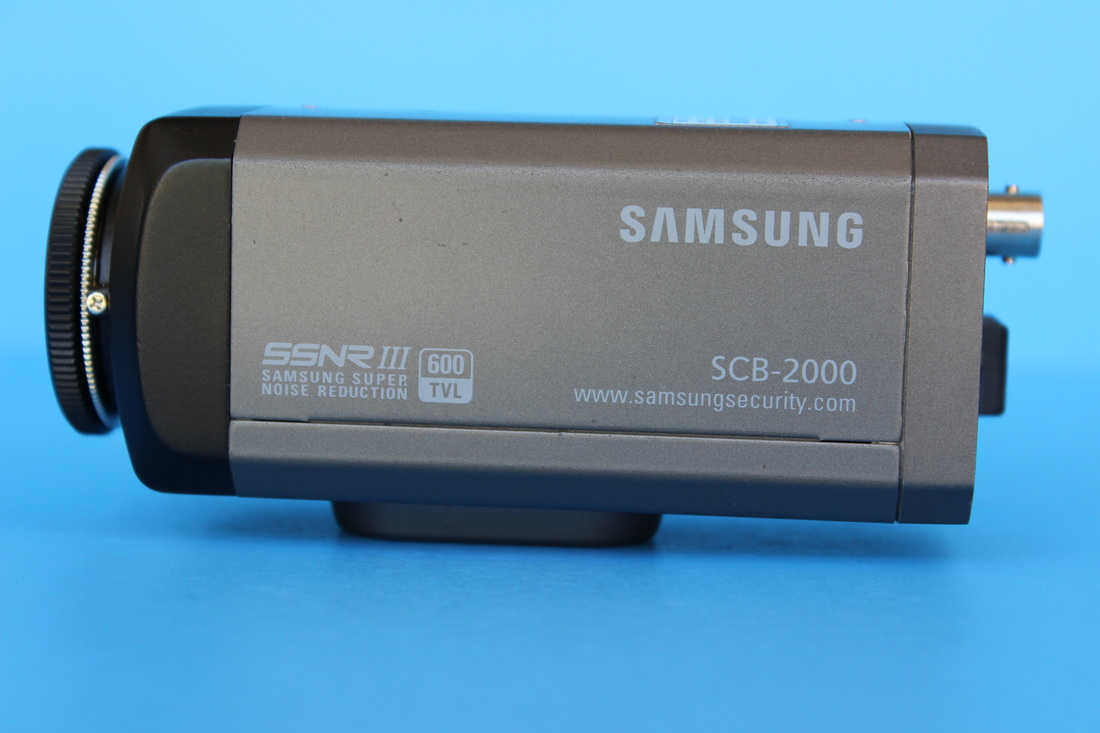
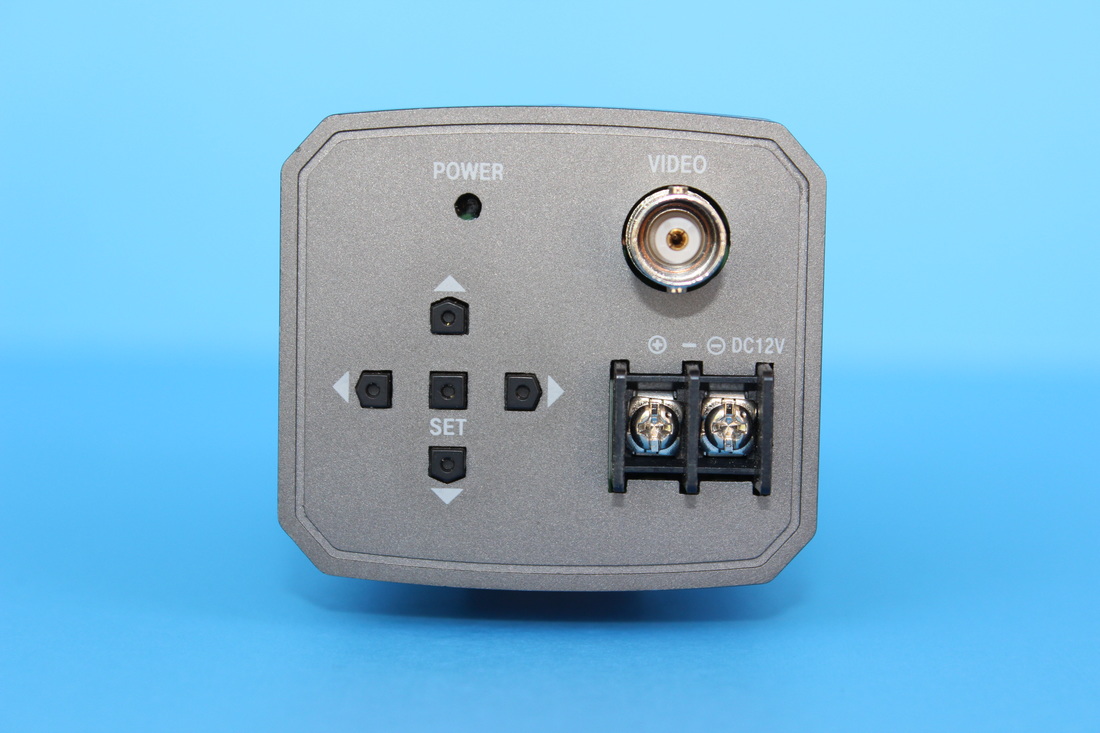
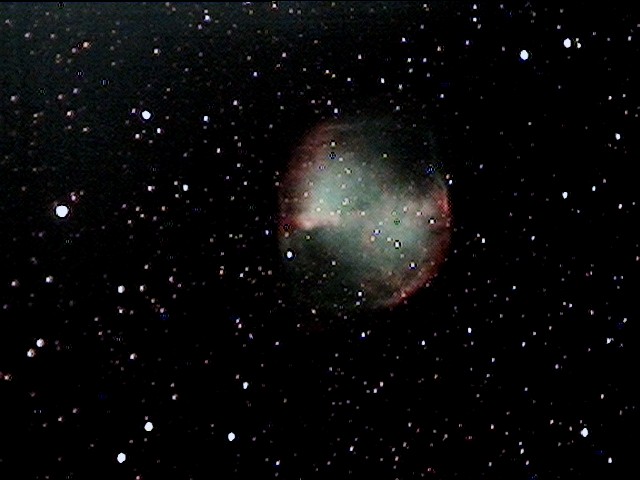
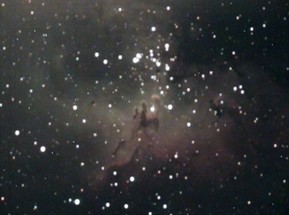
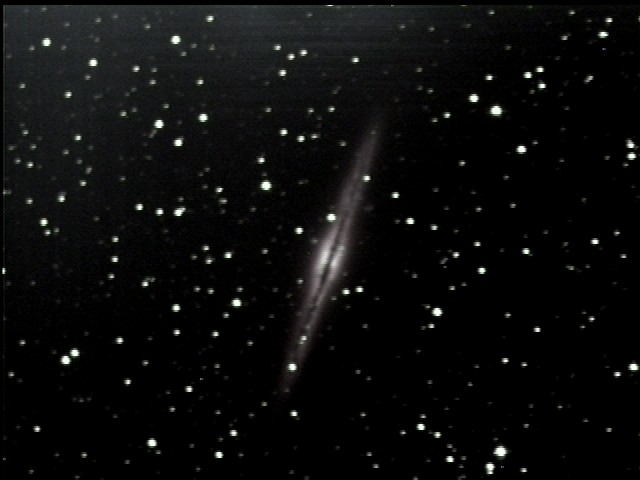
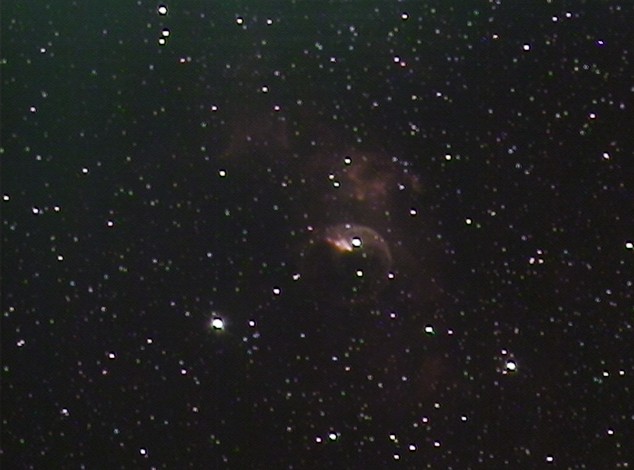
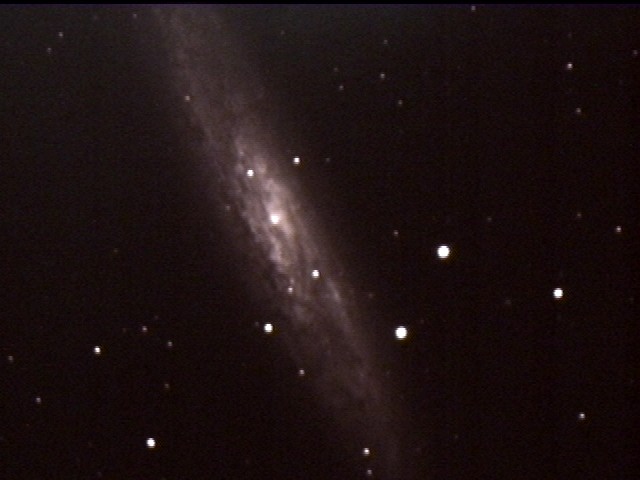
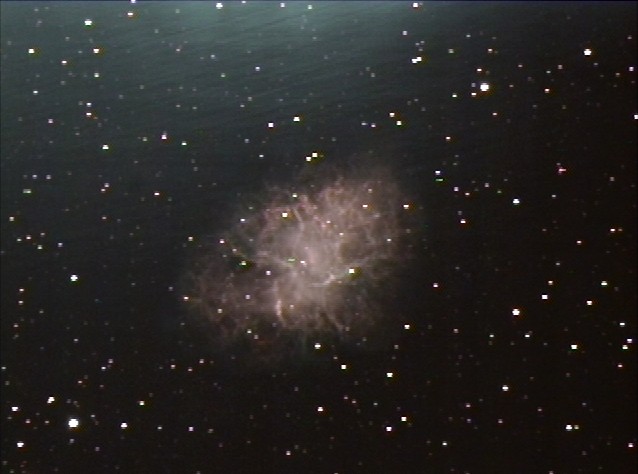
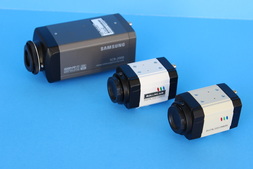 This is an expanded and updated version of the article I posted on Cloudy Nights in November 2014. It is not necessary to spend hundreds of dollars to get started with some surprisingly good performing video cameras. I recently experimented with three astrovideo cameras which are available for less than $110. These are the Astro-Video Systems DSO-1, the Mallincam Micro-Ex and the Samsung SCB2000. In addition to the camera, you will need a composite video cable, a C-Mount adaptor and a 12VDC transformer or a cable with a cigarette plug and a 12VDC battery. Both the DSO-1 and Micro-Ex can be purchased as packages with the necessary accessories for less than $200, or these can be purchased separately on-line or at your local electronics store for less than $100. For anyone looking to get started in deep sky video astronomy, any of these cameras provides a low cost point of entry. They all use Sony's 1/3" color CCDs with high sensitivity which provides lots of detail with even very short exposures. The camera menus are controlled by five small buttons on the backside. Optional hand controls make it much easier to change menu settings, given that the buttons are very small and hard to see in the dark, especially as the scope slews across the sky and the camera orientation changes. The Micro-Ex and DSO-1 can also be computer controlled with an additional cable which attaches to the serial connection on the back of the camera and uses a serial to USB adapter to connect to the computer. Additional software is required to control the camera menu settings from the computer and is available as a free download from the manufacturer's site. All three cameras have a single bayonet style video output connection on the back of the camera (called a BNC connector) which is designed for a 75ohm shielded cable. These cables are available in two types. First, with the BNC connector on both ends of the cable, which requires a BNC to RCA adapter on the end connected to the monitor. Second, with the BNC connector on one end (camera output) and a composite video connector on the opposite end (monitor input). Either cable works by connecting the RCA adapter or the composite video connector to the yellow composite video input on the monitor. To display images on the computer and/or to capture images, the video output must be connected to the video input of a video capture device such as a Pinnacle Dazzle or similar. The USB output of the capture device is then connected to one of the USB inputs of the computer. Additionally, video capture software must be run on the computer to display and capture images. There are many free video capture software applications such as AmCap or SharpCap and some inexpensive software with some very good additional features like Miloslick and AstroLive. The key to a deep sky video camera is the ability to manually control exposure, gain, and white balance which all three cameras support. Other additional features, like in camera image stacking/averaging, zoom, cross-hairs, etc vary by camera. All three cameras have pros and cons about them, but all are capable of providing lots of satisfaction and are good choices to start in video astronomy. In addition to features, don't forget to consider manufacturer's warranties, support, history and reputation. Samsung SCB 2000 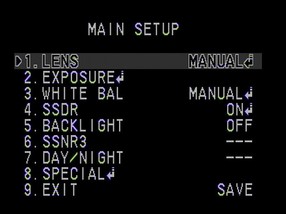 This camera is sold as a video surveillance camera, but has been successfully used for deep sky video. It uses the 1/3" format Sony ICX638 Super HAD II color CCD with 768 x 494 active pixels (379K). Each pixel is 6.35 x 7.40 microns in size. The camera ships with an IR-cut filter installed in front of the CCD, which should be removed to improve the camera's sensitivity in the all-important Halpha part of the spectrum. This is easily done in about 10 minutes with only a screw driver and instructions found here. While it's maximum exposure of 8.5 sec is half that of the other two cameras, it is long enough to bring out detail in many different DSOs and helps to keep the "real-time" sense of viewing as with an eye piece. If using the computer to capture images, a sequence of 8.5sec images can be captured and stacked just like traditional astrophotography to smooth out noise and bring out even more detail. Software like Nebulosity can be used to do the post capture alignment/stacking and stretching of the combined image to create some very impressive images. Shorter exposures of 1/60 to 1/120,000 sec are available for planetary, lunar and solar imaging. The menu settings are adjusted from the On Screen Display (OSD) which has settings for exposure, gain, white balance, noise reduction, etc. There are also some special options available such as digital zoom, sharpness, image mirror flip in the horizontal or vertical, titles, etc. Many of the settings are accessed by selecting one of the 8 options in the Main Setup menu and navigating to additional menu pages below these. The SCB 2000 is several times larger in overall size than the other two cameras with dimensions of 2.05" Height x 2.28" Width x 4.76" Depth. It weighs about 10.6oz. This camera can be purchased on-line for just under $100 but that is without a video cable, C-mount adaptor or power supply. A single frame image of the Dumbbell Nebula, M27, clearly shows the colors of the nebula amid a field of stars. The image was taken with a C9.25" SCT equipped with a focal reducer and an Astronomikc UHC filter from my suburban back yard. The maximum exposure of 8.5sec was used and the gain, AGC, was set to low. Using Nebulosity to stack and stretch 10 x 8.5sec images of M16, the Eagle Nebula, taken with AGC set to Low the Pillars of Creation are clearly evident. A C14" SCT at f/2 using an Astronomik UHC filter was used to take the stack from my back yard. In addition to the shorter maximum exposure compared to the other two cameras, it appears to me that this camera has more hot/warm pixels and background noise than the other two cameras. That just might be because the camera is several years older than the other two, but I cannot say for certain since this is a borrowed camera. 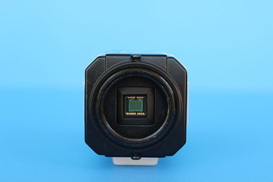 Mallincam Micro-EX While the Samsung has been around since 2009, the Micro-Ex was released in 2014. The Ex uses the 1/3" format Sony ICX672AKA ExView HAD II color CCD with 976 × 494 effective pixels. Each pixel is 5.0 x 7.4 microns in size, slightly smaller than the Samsung's pixels. This camera has no IR filter over the CCD so it can be used as is. From the outside, the Ex bears a striking resemblance to the LnTech 300 from Korea, as it uses the same external casing. However, information on the Mallincam web site indicates that the camera "has been custom made to our specification ...". The maximum single exposure of the Ex is 17 sec., twice that of the Samsung. In addition, the camera has a feature called 3D-DNR which performs a combination stacking and averaging on up to 5 images at the specified exposure which can extend the exposure to 85 sec. The 3D-DNR feature is very useful for smoothing out the noise and increasing detail. Shorter exposures of 1/60 to 1/100,000 sec are also available for lunar and planetary imaging. The EX also has two levels of gain (AGC Low, AGC High) to boost the camera sensitivity to get more detail or to reduce exposure lengths. While the Ex has a color CCD, when AGC or 3D-DNR are used the images will revert to black and white. A solution to this has been posted on the web which includes reducing the brightness to 2 from the typical 40 to 99 and raising the color R-Y and B-Y settings to their maximum values of 250. I have confirmed that these settings will provide a color image with AGC and/or 3D-DNR, but it has also been reported that the low brightness setting actually prevents the camera from obtaining the full exposure expected with AGC and 3D-DNR on. Further testing is required to convince me one way or another. 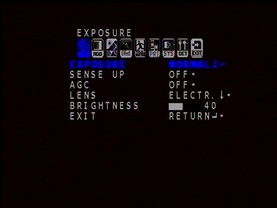 The OSD for the Ex is organized differently from that of the Samsung, but supports all of the same important functions like exposure, gain, white balance, etc., as well as, additional features of its own. This Micro-Ex is one of the smallest cameras that I have seen used for deep sky astronomy. It has a weight of only 5.04oz and dimensions of 1.7" Height x 1.7" Width x 2.44" Depth. Using a C14" at f/2 and an Astronomik UHC filter, the single 85 sec image below of NGC 891 was taken at a dark site. The image used the 3D-DNR feature to stack/average 5 - 17sec frames internally. Nebulosity was used to stretch the image post exposure. The prominent dust lane is clearly visible in this edge on galaxy. The Bubble Nebula was capture with the same scope from my backyard but without a filter. The Bubble is clearly visible in this 10 x 17sec image which was stacked and stretched in Nebulosity. 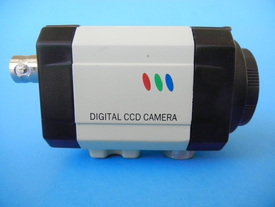 Astro-Video Systems DSO-1 Astro-Video Systems has been selling astro video cameras for about 3 years. While the DSO-1 looks identical to the LN300 (as does the Micro-Ex), Matt at Astro-Video Systems says that the external case is the only common component with the LN300. The camera size is identical to the Mallincam MIcro-EX and I expect the weight is nearly identical. 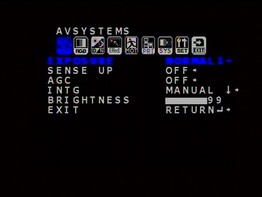 The OSD is very similar to the Micro-Ex, but there are some significant changes in both names and features. For instance, INTG replaces LENS and INTERMUL replaces 3D-DNR. The DSO-1 also uses the Sony ICX672AKA ExView HAD II CCD with 976 × 494 effective pixels, each 5.0 x 7.4 microns in size, although I believe the camera can be purchased with several other sensors (ICX673, ICX810, ICX811). Like the Ex, the maximum exposure is 17 sec. Shorter exposures of 1/60 to 1/100,000 sec are also possible. Like the Micro Ex 3D-DNR, the DSO-1 has an internal stacking/averaging feature called INTMUL which enables from 1-5 exposure in camera stacking/averaging for less noisy and more detailed images. This effectively enables an exposure of 5 x 17sec =85sec . AGC on the DSO has 3 levels. Using my C14" at f/2 and an Astronomik UHC filter at a dark site, I was able to capture the single image of NGC 891 shown here. The camera was set to AGC 36db, INTMUL=5 and exposure to 17sec for an 85sec internal stack. The adjacent single frame image of M1, the Crab Nebula, was taken with my C9.25" SCT at approximately f/4.5 with the exposure set to 17sec with INTMUL = 5, for a total imaging time of 85sec for the 5 images stacked and averaged by the camera internally. Even with AGC or INTERMUL engaged the image is still in color. 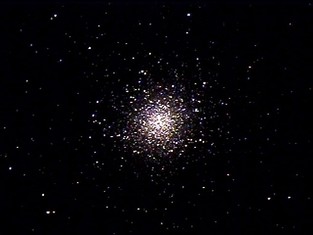 While I have focused mostly on nebulae and galaxies here, these cameras also do a wonderful job on star clusters and globulars. Here is a single frame image of M13 taken with my C14" at f/2 from my back yard. The exposure was 17sec and gamma was set to 0.3. So, there we have three options for DSO viewing and imaging for under $110. Much more can be found out about each of the cameras from the manufacturer's web sites, the associated Yahoo Groups, Night Skies Network and from the Electronically Assissted Astronomy Forum on Cloudy Nights. © 2015 Curtis V. Macchioni |
Categories
All
Archives
January 2024
|
 RSS Feed