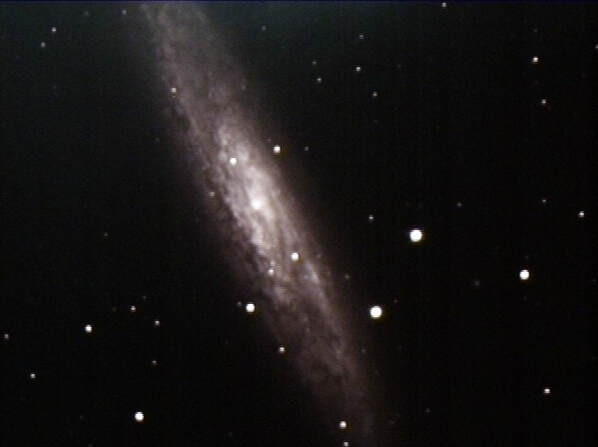
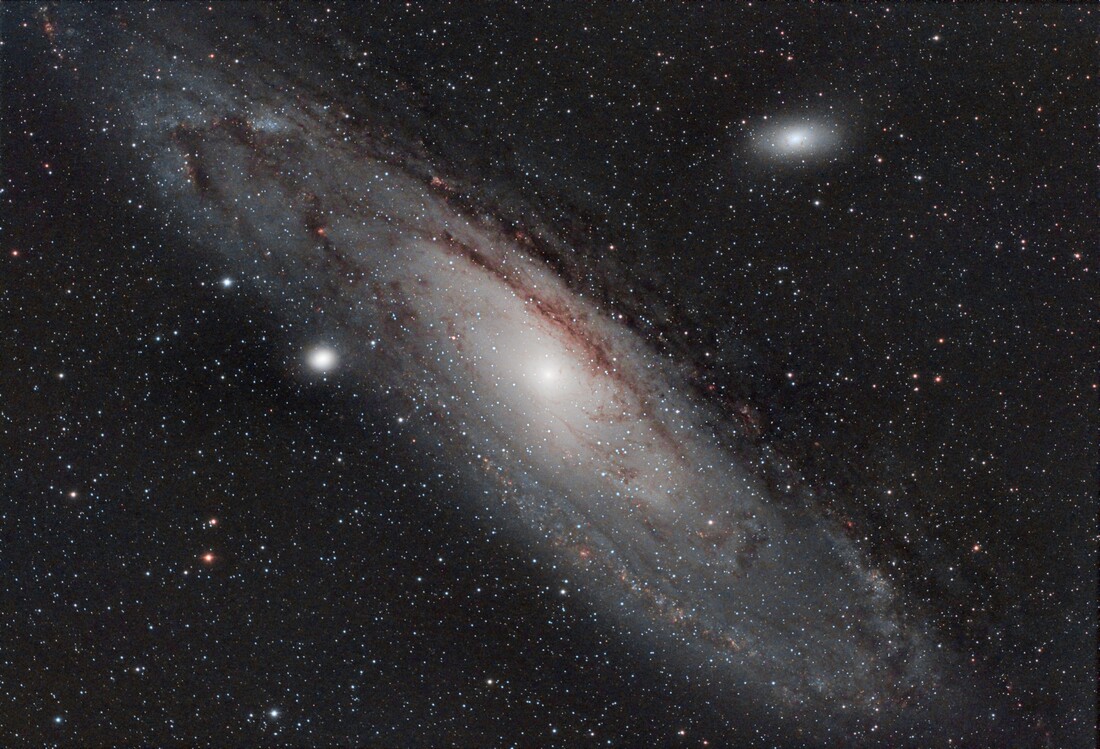
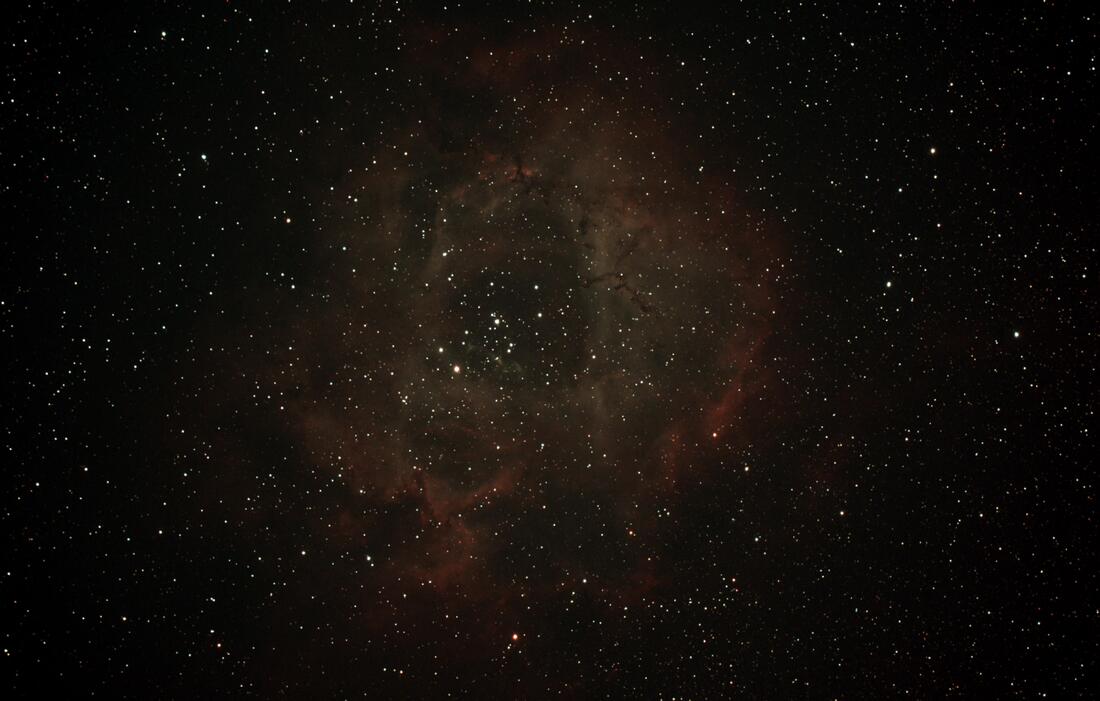
 22 sec image of NGC253 Hyperstar on a 14" SCT 22 sec image of NGC253 Hyperstar on a 14" SCT If you own a Celestron SCT and do not already have a hyperstar adapter you should. What is hyperstar? It is a multi-element optical adapter which converts the focal ratio of an SCT from its native f/10 to f/2. Since the optical speed of a telescope is proportional to the square of its f-ratio, adding a hyperstar will increase the speed of an SCT by a factor of 25: speed ~ (10/2)^2 = 5^2 = 25. My first experience with hyperstar was back in 2015 when I first tried it on my 14" SCT to capture a breathtaking view of NGC253 the Sculptor Galaxy in just 22seconds. I was just blown away by what the hyperstar was able to capture in such a short time. Of course, smaller aperture telescopes will not produce such an image in the same time, but they will still have 25X faster optics resulting in amazing images in short times of their own right. Hyperstar is available for the 6", 8", 11" and 14" Celestron Edge and non-Edge SCTs and the 9.25" Edge version. It has been available for these models for some time. Just check the front of the Secondary mirror for the phrase "Fastar", where Fastar is the original Celestron name for this, to see if your older model is compatible. For those that do not say "Fastar" a conversion kit is available for all 6" through 14" models except the 9.25" model. 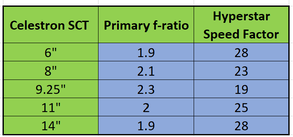 How does hyperstar work? An SCT consists of three optical elements, a corrector plate at the front, the primary mirror in the back and the secondary mirror in the center of the corrector. SCT primaries are spherical mirrors configured to a focal ratio of f/2. Actually the focal ratio of a Celestron SCT primary varies between f/1.9 and f/2.3 depending upon the model as shown in the accompanying table. For the sake of simplicity, lets stick with f/2 as our example. The secondary mirror is figured to a focal ratio of f/5 so the combined effect is a focal ratio of f/10, f/2 x f/5 = f/10. 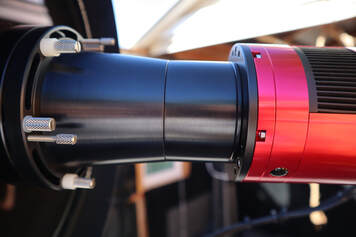 The camera adapter is seen between the hyperstar and the camera. The camera adapter is seen between the hyperstar and the camera. Hyperstar is installed by removing the secondary mirror and replacing it with the hyperstar compound lens. With no secondary the focal ratio is that of the primary mirror, or f/2. Obviously the hyperstar element can only be used with a camera for imaging, either for traditional astrophotography or electronically assisted astronomy, and not for visual observations. A camera is attached to the hyperstar via an adapter which is specific to the camera and hyperstar size. The light enters the SCT through the front corrector plate and reflects off the primary mirror just as it always does. But now, instead of reflecting off the secondary mirror back through the center of the primary and out the back of the SCT, it travels through the optical elements of the hyperstar and into the camera. The hyperstar is a multi-element lens/corrector which not only focuses the light onto the sensor in the camera, but also corrects for the spherical aberrations and field curvature which would be present without the corrective capability of the hyperstar. Images taken with the hyperstar should be sharp and flat across the field of view. Hyperstar can be used for both traditional astrophotography and electronically assisted astronomy. In both cases, the faster focal ratio enables more light to be collected in a given time compared to the SCT's native focal ratio of f/10. The results can be stunning as in the traditional astro photo of M31 shown below taken on a C11 with hyperstar for a total exposure time of 213 minutes using Pixinsight to combine and process hundreds of sub-frames. Similarly, amazing results can be obtained during live stacking and viewing during an EAA session as seen in the image of the Rosette Nebula taken with TSX's Live Stack feature stacking and stretching 120 x 5 sec sub-frames for a total of 10 minutes also using a C11 with hyperstar. 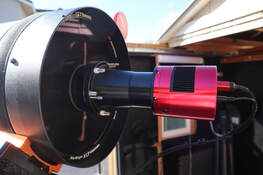 A C11 with hyperstar and an ASI2600MC A C11 with hyperstar and an ASI2600MC Installing Hyperstar Removing the secondary mirror from your SCT may sound scary but it really is a simple matter. I like to set the OTA at a slightly elevated angle so it is easy to reach the secondary and gravity will still help to keep it in place when its retaining ring is removed. The secondary slides out and can be placed into the protective holder which comes with the hyperstar. The hyperstar is threaded onto the secondary holder. But be careful not to over tighten the hyperstar. Finger tight is sufficient. I once got the hyperstar so tight that I had to remove the corrector plate to get it back off. You should not have this problem if you do not over tighten the hyperstar like I once did. After installing the hyperstar several times you will even feel comfortable doing this in the dark. The procedure should take only 5min or less. While hyperstar can weight as much as 3lbs for the 14" SCT it is not going to damage your corrector plate when handled carefully. An SCT corrector plate is much stronger than one may realize. Still, I would never transport an SCT with a hyperstar installed as the possibility of banging into the hyperstar is always present. Also, when covering the telescope using a hyperstar with an all weather cover just be careful that the cover does not snag on the hyperstar which protrudes from the OTA. I leave my hyperstar on for multiple days while in the field using a dew shield and cover over the hyperstar and correct which keeps dirt and dust off the corrector. At home I leave my hyperstar mounted on my SCT in the backyard observatory as long as I plan to work at f/2. There is really no need to remove and re-install hyperstar every day. 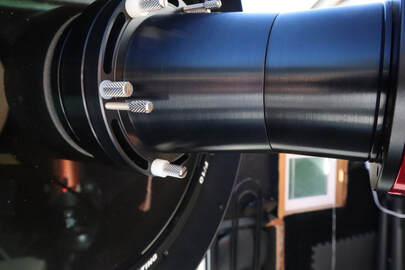 Push/Pull collimation pins at left and a rotation thumbscrew at bottom Push/Pull collimation pins at left and a rotation thumbscrew at bottom Hyperstar Collimation Just like the secondary mirror on an SCT, hyperstar will need to be collimated from time to time. Fortunately, hyperstar seems to hold collimation just as well as a secondary mirror so you should not expect to need to collimate any more frequently than you do without it. Also, you most likely will not need to re-collimate your scope when you put the secondary back since it is indexed to the optical axis with a pin which fits into a notch in the flange which holds the secondary. Hyperstar has 3 sets of push/pull pins located at 120 deg increments around the outside for the purpose of collimation. There are two strategies for initial collimation. The simplest takes advantage of the high precession machining of the two hyperstar mechanical bodies. Just adjust the push/pull pins so that both flanges of the hyperstar bodies are in contact all the way around and then tighten the pins. So long as these two flanges are parallel to one another and the corrector plate is aligned with the primary mirror you should have good collimation. Several folks have reported that this has worked for them so it is worth trying first. If you are not satisfied with the collimation with that approach you can use the second method. With this approach you will need 3 shims 30 to 40 mil thick. Metal stock of this type can be found at your local Ace hardware or online. I use Cu stock which I cut into 3 pieces long enough to fit between the two hyperstar flanges. With the shims spaced 120 degrees apart between the two hyperstar flanges, tighten the push/pull pins just enough so that you can barely pull the shims out. Make sure that you tighten pins are engaged so that the flanges do not come loose. Then, under the stars perform a collimation as you normally would using the push/pull pins in the same way as you would the 3 screws on the back of the secondary mirror. You will find that it is a lot easier to adjust the push/pull pins with your fingers. Just make sure they are all tight when you are satisfied with collimation. A very large variety of cameras are compatible with hyperstar including those from ZWO, QHY, ATIK, SBIG, etc. When ordering the hyperstar element you will need to specify the camera that you will use with it since a camera adapter is required to attach the camera to the hyperstar lens at the optimum distance from the camera sensor. 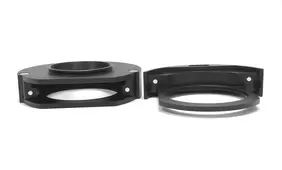 Hyperstar filter drawer and slider Hyperstar filter drawer and slider Using Hyperstar The hyperstar adapter has 3 thumbscrews which are designed to allow 360 degree rotation of the hyperstar so that you can adjust the orientation of your camera. Just loosen all three thumbscrews 1/4 turn, rotate the the outer body of the hyperstar to the desired orientation of the camera. Then tighten the thumbscrews to lock the camera orientation. Since these thumbscrews hold the two halves of the hyperstar together, you should never completely remove them. USB and power (if needed) cables are attached to the camera as usual. If you are using a dew shield you can either bring the cables out the front of the shield or, out the back of the shield if it has a notch in it. In either case tie off the cables so they do not drag. In some cases, the cables may produce diffraction spikes on bright stars just like the spider vanes on a Newtonian secondary. This can be minimized by avoiding running the cables in a straight line across the front of the OTA. The hyperstar camera adapter is threaded inside so that a filter can be attached. This works well if you intend to use only a single filter, such as a light pollution filter, a UV-IR filter or a multi-band filter during you imaging session. Just unscrew the front piece on the adapter, screw in the filter and screw the adapter/filter combination back on. Then attach the camera. If you want to change filters during a session you will need a filter drawer for the hyperstar. The filter drawer screws onto a separate hyperstar adapter such that the combination provides the correct backspacing for your camera. Everything else in an imaging or EAA session will be the same as if you did not have the hyperstar except it will require much less time to be able to see DSOs compared to operating at f/10. Wide Field Since the hyperstar reduces the focal ratio to f/2 but does not reduce the aperture of the telescope, the field of view will be much wider. In fact, the field of view will also be 25X larger compared to f/10, 5X in each axis of the camera sensor. This is precisely how the hyperstar speeds up imaging. To understand this let's take a look at the difference in image scales at f/10 and f/2. Image scale depends upon the size of the pixels in the camera and the focal length of the telescope. It is defined by the following equation: Image Scale (arc-sec/pixel) = 205 x pixel size (microns) / focal length (mm) So, for the same camera, the image scale varies inversely with the focal length. In other words, the image scale increases as the focal length gets smaller. Adding the hyperstar reduces the focal length proportional to the reduction in focal ratio. For the C11 discussed above the focal length is reduced from its native 2794mm to 559mm with hyperstar. The image scale is then reduced by the same factor of 5 across the x and y axis of the camera chip. This means that each pixel is collecting light from an area of the sky 25X larger with the hyperstar than without the hyperstar which is why the exposure time is reduced. Keep in mind that with the wider field of view the resolution is now reduced by the same amount. But since seeing conditions usually dominate image resolution stars and most CMOS cameras used for astronomy have sensors with pixels smaller than 4microns on a side the image quality will still be excellent, even if you zoom in on the image. Summary
Hyperstar is certainly expensive costing just under $1000 for an 8" SCT and more for larger apertures. However it should be viewed as turning your f/10 SCT into a completely new telescope with a focal ratio at least 4X faster than the fastest refractors available while maintaining an aperture many times larger than a refractor. Think of it as investing in an entirely new scope but without having to purchase a new set of accessories (finder, dew heater, focuser, etc.). As the few images shared here show, hyperstar can produce incredible images in real time and is well suited to capturing more of the larger DSOs. If you want to see more about the amazing hyperstar check out my hyperstar YouTube video Links are affiliate links which can earn a commission without any cost to you. Please consider using them to help support this web site. Hyperstar is available from HighPoint Scientific bit.ly/3RO8vgv
0 Comments
|
Categories
All
Archives
January 2024
|
 RSS Feed