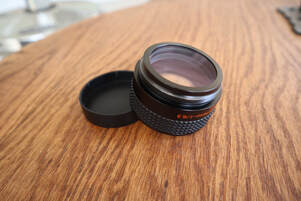
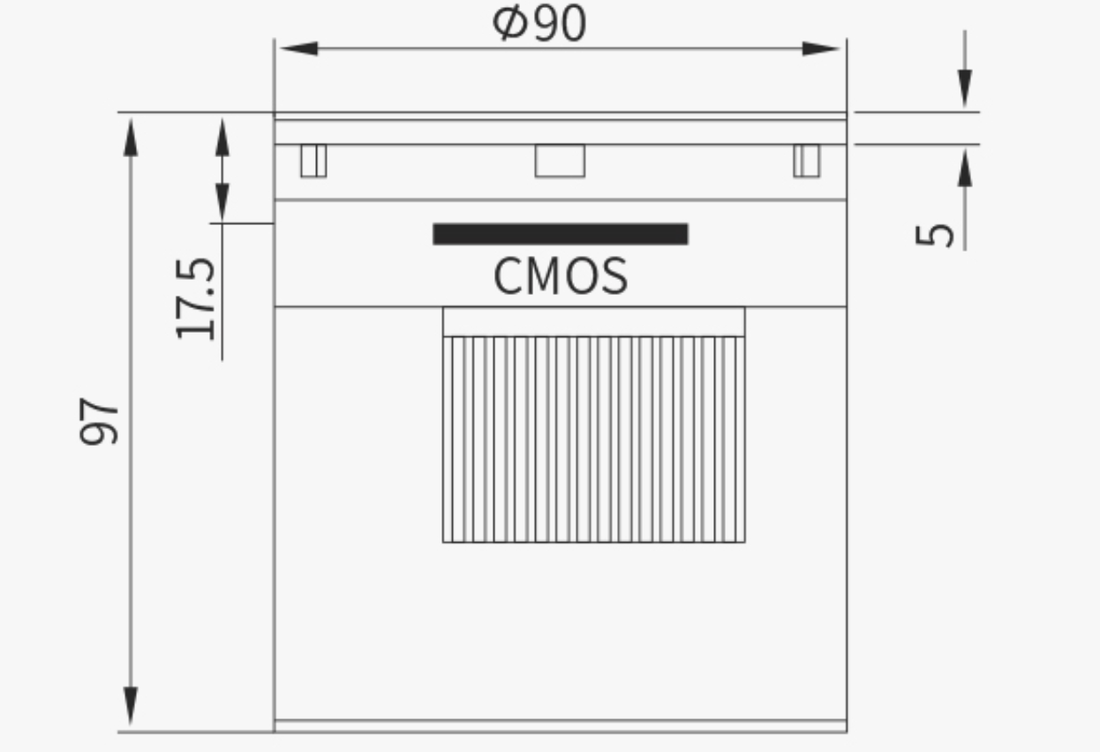
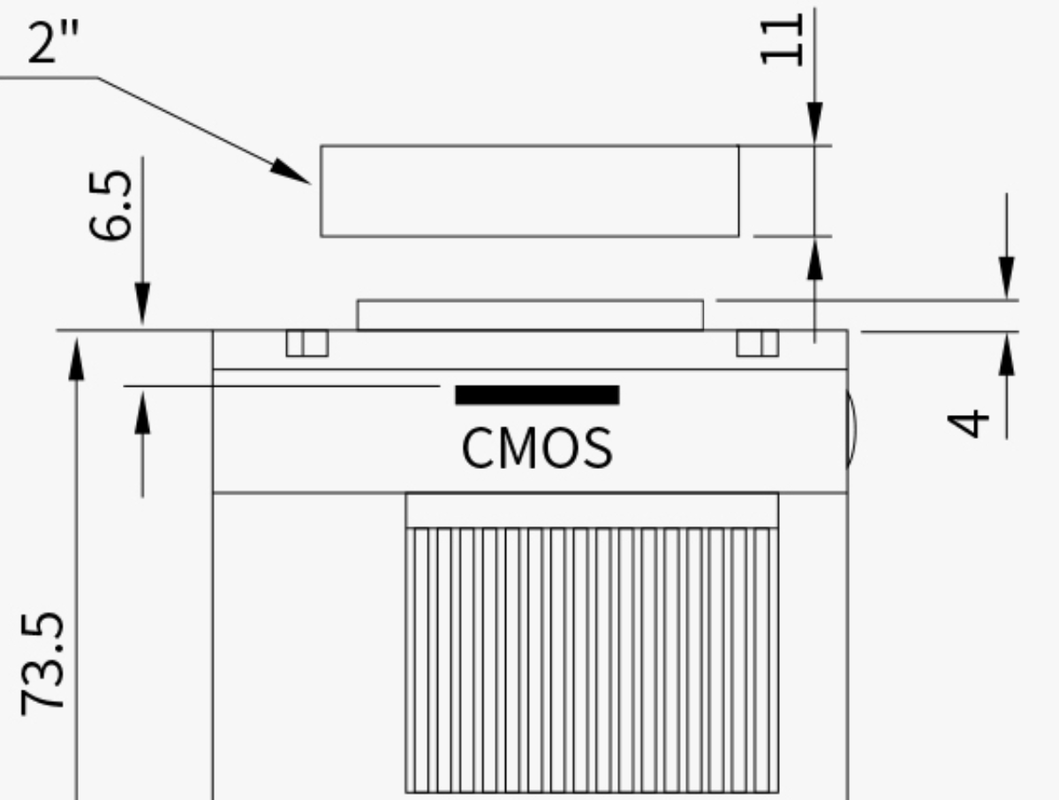
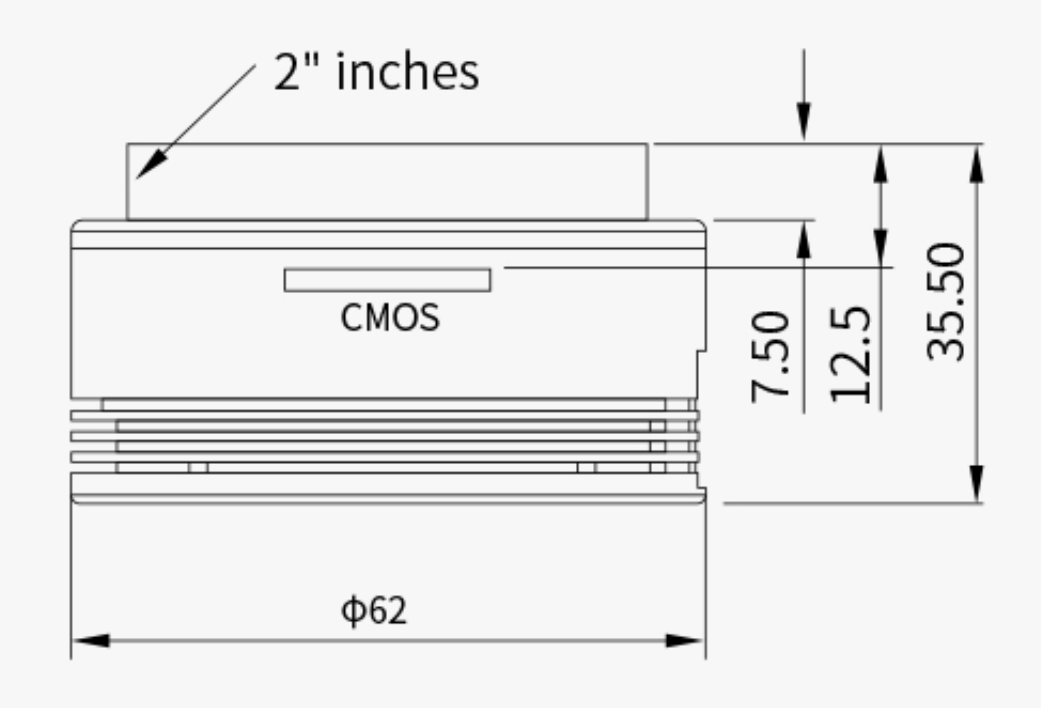
 Celestron's 6.3X focal reducer/field flattener is a very popular accessory for non-Edge SCTs because it reduces the focal ratio of the SCT from its native f/10 to f/6.3. This increases the field of view (FOV) and increases the optical speed of the SCT as well. Both effects are helpful for astrophotography and Electronically Assisted Astronomy as they make shorter exposures possible and allow larger Deep Sky Objects (DSOs) to fit in the camera's sensor. And because it is also a field flattener it will improve the sharpness of the image at the edge of the FOV. The same benefits of a wider field and more intense image apply to visual observers as well Reducing the focal ratio with this reducer speeds up the optics by a factor of (10/6.3)^2 = 2.5. It concomitantly increases the FOV by the same amount. For instance, an 8" SCT with the ZWO ASI533MC camera has a FOV of 19.4 x 19.4 arcminutes at f/10 which increases to 30.8 x 30.8 arcminutes at f/6.3. That is 376 arcminutes-squared vs 949 arcminutes-squared with the later 2.5X the former. For the 8" SCT the focal length reduces from 2000mm to 1260mm with the reducer. Determining the Correct Back Spacing Target For any focal reducer to work as designed It is important to place the sensor of the camera at the correct back spacing, or distance, from the focal reducer. This will ensure that the focal reduction will match the design target, in this case 6.3X. It also ensures that the field flattener works optimally to provide sharp, round stars to the edge of the FOV. If the camera's sensor is placed closer to the focal ratio will be larger, say 6.5X or 7X, and the focal reduction will be less. If it is placed further from the reducer the focal ratio will be smaller, say 6X or 5X, and the reduction will be more. In addition, the field flattener will not perform optimally so stars near the edge of the FOV may be distorted. For astrophotography we want to get the best possible images so we want to be as close to the ideal back spacing as possible. For Electronically Assisted Astronomy (EAA) we may be less fussy about the edge of the FOV and more interested in speeding up the optical system and/or fitting more of the larger DSOs in the FOV. In that case a slightly larger back spacing is sometimes used. Regardless, it is important to know how to get the correct back spacing to begin with. 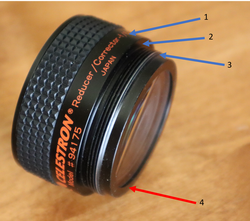 Different locations often identified as the back spacing measurement starting point. 1) Center of the internal lens'; 2) Inner flange; 3) Outer edge of the threads; 4) Back flange. Different locations often identified as the back spacing measurement starting point. 1) Center of the internal lens'; 2) Inner flange; 3) Outer edge of the threads; 4) Back flange. So, how do we achieve the correct back spacing when using the Celestron 6.3X focal reducer? We need to know the correct back spacing and how it is measured. If you search the internet you will find answers ranging from approximately 100mm to 110mm with the most common answer being 105mm. Surprisingly Celestron has not published a spec for the back spacing for this reducer. If you also look to find out where on the focal reducer the back spacing measurement is made, this is where you will find the most disagreement. Some suggest the measurement should be made from the center of the lens' inside the focal reducer (1 in the image above), others from the flat surface on the inside of the threads (2), or the back edge of the threads (3) as shown in the photo. The correct answer to both of these questions is 105mm from the extreme back surface of the focal reducer as shown in the photo identified as location 4 in red. So how do we know that these are correct? 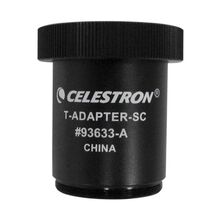 Celestron SCT T-Adapter (50mm) Celestron SCT T-Adapter (50mm) First, we know that the industry standard back spacing for focal reducers used on refractors is 55mm (there are some exceptions). Second, because the optics of an SCT is very different from a refractor it is not possible to make a focal reducer for an SCT with a back spacing of 55mm. So, Celestron did the next best thing. They made an adapter which attaches to the back of the focal reducer and is exactly 50mm long. This leaves the industry standard 55mm left to obtain the correct back spacing of 105mm. Also note that the 50mm length of this adapter is measured from the the flat surface of the flange which mates with the surface "4" in the image above to the flat surface on the other end of the adapter not including the threads where the next spacer will bottom out when screwed all the way on. Similarly, Celestron makes a 7X focal reducer for their Edge SCTs and in this case they do specify the back spacing as 146.05mm. And likewise, they make a T-Adapter to attach directly to this focal reducer which is 91mm long leaving 55.05mm of additional spacing to meet the back spacing spec. So, I think it is clear that the design back spacing for the 6.3X reducer is 105mm and not 100mm, 110mm or something else, and that it is measured from surface 4 on the focal reducer. Imaging Train Options for the 105mm Back Spacing Now that we have established that we need 105mm of spacing for the Celestron 6.3X reducer we need to figure out what options are readily available. But first, we need to take into account the back spacing of the camera sensor itself. This can be found from the manufacturer and we will use ZWO's ASI cameras as an example. Below is ZWO's mechanical drawing for their ASI2600MC camera. This shows the position of the CMOS image sensor relative to the front surface of the camera to be 17.5mm. Likewise the ASI585MC has a back spacing of 17.5mm for the sensor even though it uses a different coupler on the front face. If you look at most cameras these days from ZWO and other manufacturers you will find that 17.5mm is the most common back spacing for the sensor. However, be careful to check as the ASI224MC shown below only has a 12.5mm back spacing. Like plumbing or garden irrigation systems there are many different spacers and adapters available such that one can find many combinations of such to make up the additional back spacing needed. After searching through multiple astronomy supplier's sites I have come up with what I believe to the be the least complicated solutions using the simplest set of adapters available to achieve the 105mm back spacing. I list the parts needed below along with links to either Agena Astro or HighPoint Scientific, two of my goto astronomy suppliers. Links are affiliate links which will earn a small commission at no cost to you. Please use these if you can to support my web site. From Agena Astro Celestron 6.3X focal reducer Celestron 50mm SCT-T Adapter Blue Fireball 37.5mm Extension ZWO 11mm Female to Female Adapter If you want to fine tune the spacing you can use Baader T2 Delrin spacers to adjust the spacing in small increments from 0.6 to 1.4mm. If you want to make larger spacing changes you can search for the desired M42/T2 spacer from Blue Fireball, or substitute the Baader Varilock 46 T2 Variable Extension in place the 37.5mm Extension listed above for greater versatility. Here is an almost identical solution from HighPoint Scientific. Since they do not list a 37.5mm spacer it uses a 30mm and 7.5mm spacer which are sold together as a kit from Celestron. From HighPoint Scientific Celestron 6.3X focal reducer Celestron 50mm SCT-T Adapter Celestron M42 Spacer Kit (30mm + 7.5mm) ZWO M42 Female to Female 11mm Adapter Alternatively to the Celestron M42 spacer kit one could substitute the Baader Varilock 46 T2 Variable Extension which, while almost twice as expensive, allows for variability in the spacing. Also the Baader T2 Delrin Spacer Ring Set is an option for fine tuning the spacing on the order of a mm or less. 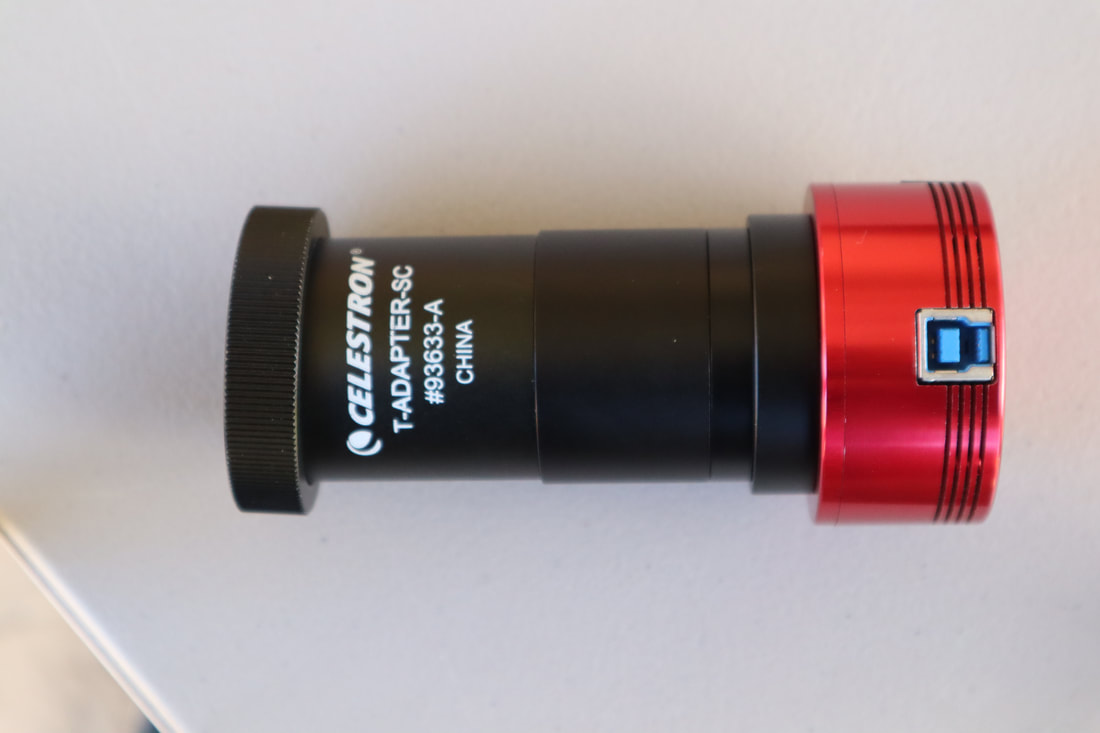 105mm back spacing with ZWO ASI1600MC camera and the adapters/filter listed above from HighPoint Scientific Back Spacing Solutions With a Filter Drawer Now if we want to use filters with our camera we can put a filter drawer in line so that it is easy to change filters in real time. In this case we will need some different spacers and adapters. Also, we need to take into account the fact that the glass of the filter has a different index of refraction compared to air. Filter glass is typically 2-3mm thick so we need to add ~1/3 of that thickness to our optical path for an additional ~1mm. Below is the same setup as above showing the parts needed along with links to either Agena Astro or HighPoint Scientific. Agena Astro Celestron 6.3X focal reducer Celestron SCT-T Adapter Blue Fireball 10mm Extension Blue Fireball 7.5mm Spacer Ring ZWO M42 11mm Female to Female Adapter ZWO Filter Drawer M42 Male to M48 Female ZWO M48 Male to M42 Female Adapter HighPoint Scientific Celestron 6.3X focal reducer Celestron SCT-T Adapter Apertura10mm Extension Baader 7.5mm T-2 Extension ZWO M42 11mm Female to Female Adapter ZWO Filter Drawer M42 Male to M48 Female ZWO M48 Male to M42 Female Adapter 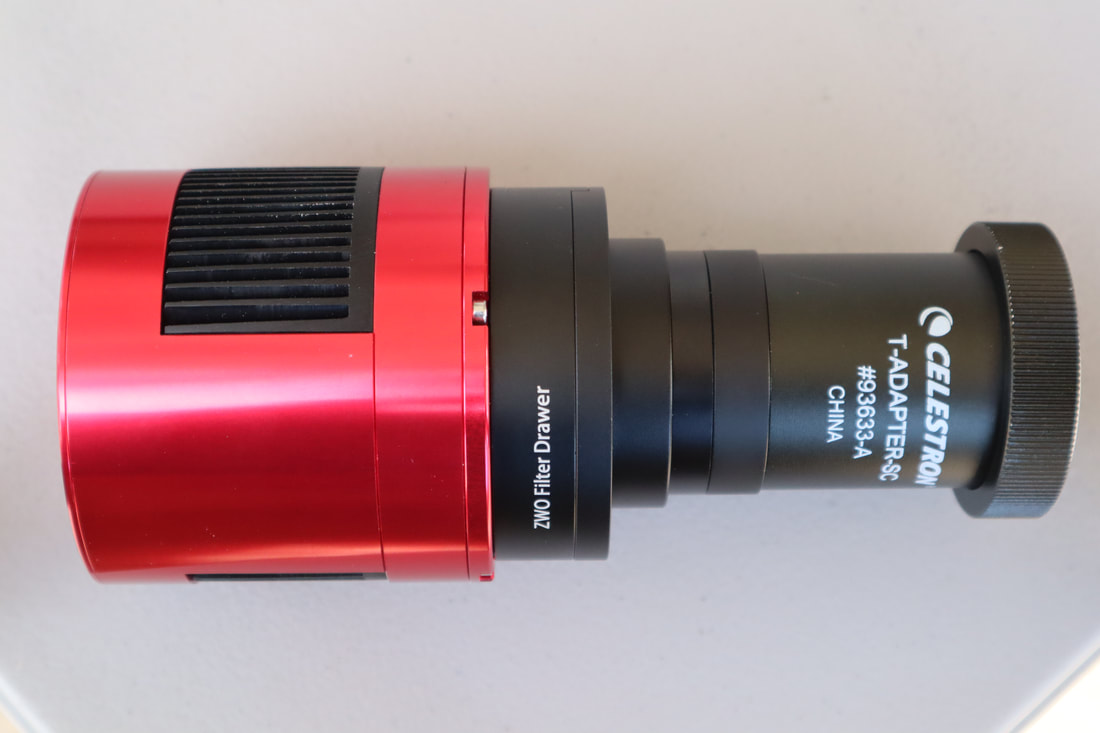 106nm Back spacing with an ASI2600MC camera and ZWP Filter drawer using the adapters/spacers listed in the list from Agena Astro Back Spacing Solutions for SE/Evo/CPC Mounts at 90deg Altitude The solutions above work with cooled and uncooled cameras on any Equatorial mount. In the case of a single arm Alt-Az mount like the Celestron SE or Evolution mounts, or a dual arm mount like the CPC mount, the solutions above will only work as long as the OTA is not pointed higher than ~75 degrees in altitude. Higher altitudes will cause the camera to crash into the base of the mount. A simple solution to reach an altitude of 90degrees without hitting the mount is to add a rail extension along with the imaging trains shown above so that the OTA can be pushed forward to provide enough additional clearance. An inexpensive rail extension is available from SVBony which will work on the 6" SCT. The longer Celestron Universal Mounting Plate is probably a better option for the 8" and 9.25" SCTs and is available from both Agena Astro and HighPoint Scientific. If using a cooled camera there will not be enough room to push the OTA forward and a different approach is needed. This approach uses a diagonal to place the camera at a right angle to the optical axis to gain additional clearance. The details of this configuration can be found in the equipment recommendations section of this web site here. If you would like to see all of these configurations in action, please take a look at the video I put together on this subject where I demonstrate each solution in detail. The video is on my YouTube channel here where you can also find other helpful videos for the amateur astronomer. All links are affiliate links which can earn a commission without any additional cost to you. Please consider using them to help support this channel.
0 Comments
Leave a Reply. |
Categories
All
Archives
January 2024
|
 RSS Feed