It is apparent that more and more amateur astronomers are interested in Electronically Assisted Astronomy (EAA) based upon the many posts on the Cloudy Nights forum asking for help to get started. EAA, using a camera with short exposures to view Deep Sky Objects in real time, has been around since the late 90s when the first video cameras like the SBIG STV were used instead of an EP at the focus of a telescope to greatly enhance the views of Deep Sky Objects. You can read about the history and evolution of EAA in my blog here " A History of Camera Assisted Viewing". While the CN forum is a great source of information, particularly for newcomers to EAA, that information is not organized in one compendium which is easy to access and use. So, while I still recommend anyone new to EAA to take advantage of the many experienced and helpful folks on CN, I hope to put together in a series of blogs the fundamental information needed to successfully and more easily get started at EAA.
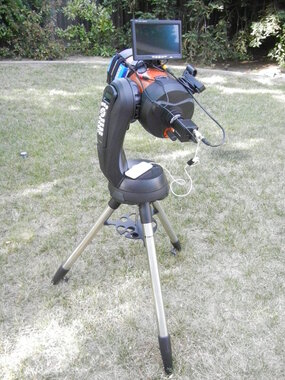
The very first and most important question one has to answer is which type of camera, analog or digital, is best for them. For most people and most use cases my recommendation is to go digital as that is the direction things have been heading for the last 5 years and will continue to advance in the coming years. However, there are significant reasons why someone would want to start with an analog camera and we cannot simply dismiss those. The Case for Analog If you are a person who absolutely does not want to use a computer then your only choice is to use an analog camera. While analog cameras can be used with a computer, they also work without one which is not the case for digital cameras. An analog camera without a computer is about as simple as it gets and has the added advantage that it requires a minimum amount of power to operate since laptops tend to be very power hungry devices. The simplest configuration includes a telescope, a camera attached to the telescope in place of the EP, a small LCD monitor connected to the camera video output, and a power source with cables to connect the power to the mount, camera and monitor. If you are working in your own backyard you can use a 3-5A AC power transformer to power everything from an AC outlet. If you are working at a dark site without AC power you can use a battery to supply the necessary power. The nice thing about this simple setup is that you can use a very small, lightweight Li battery which can even be attached to the scope along with the monitor. Analog cameras use less than 400mA of current, a 9" LCD monitor less than 300mA, and a Celestron SE, AVX or CGE mount will use less than 500mA. So an 8.3Ah battery like the one from Talentcell that I use for my simple setup will last an entire night or two before needing a recharge. This type of setup is often used for family viewing or Public Outreach events where several people at once can view the object on the display screen while the astronomer discusses interesting facts about the Deep Sky Object. It is also useful for anyone with a seeing impairment since the image can be displayed on as large of a monitor as one desires. I have used a 34" LCD TV for my public outreach but that requires a bigger battery and a DC to AC inverter to operate. 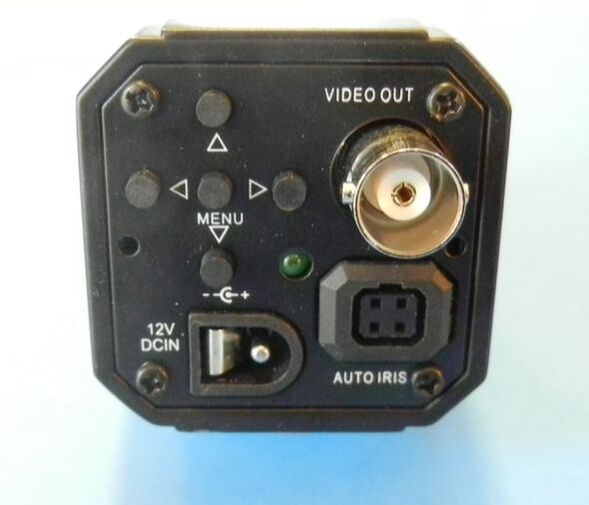
The back of the analog camera has a 12VDC power input, a video output to send the images to the display and a set of 5 buttons which are used to adjust the camera settings. There is typically another input called an Auto IRIS which is not used unless the camera is setup to use this input for either hand control or computer control of the camera menu. Otherwise the camera menu is accessed and controlled by the 5 small buttons on the back of the camera while watching the On Screen Display (OSD) of the menu on the LCD display. The video out uses a BNC connector so it is necessary to have a cable with a BNC connector on the camera end and an RCA connector on the other end to connect to a display device.
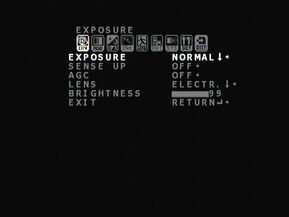
An example of an OSD is shown here. Many analog cameras are simply re-badged security video cameras, while others are security cameras with a few modifications such as increased exposure times and cooling of the sensor to reduce background noise. That means that the camera menu is designed for security applications and not for astronomy. So the menu is not intuitive and it takes a bit of a learning curve to understand how the settings apply to an astronomy application. Also, the menu consists of many layers which are accessed by clicking on one item and finding an expanded display hidden within. This can be confusing to some people at first but eventually becomes rote. It also takes some time to learn which settings need to be adjusted and what values for these settings are typical. Suppliers of these cameras offer guides for typical settings to get you started. And, you can read my blog on de-mystifying the OSD here: "Making Sense of Video Camera OSD Menus".
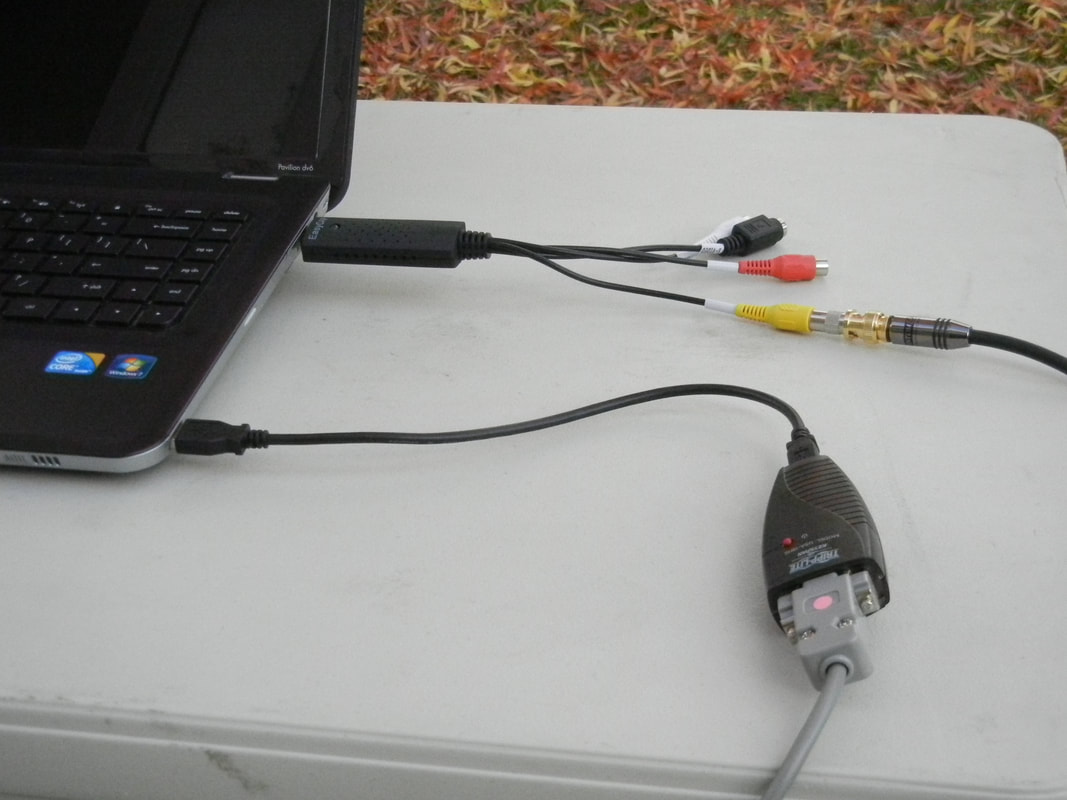
As I mentioned, an analog camera can be used both without and with a computer. There are software programs, some free, which can be used with the Mallincam video cameras like the Xtreme and Xterminator to control the camera menus and to capture and display the video image. For this to be possible the camera has been modified to connect to the computer. This is done with an RS232 cable connected on one end to the computer control input on the camera and on the other end to the computer through a USB adapter like the Keyspan from Tripp Lite. This replaces the buttons on the back which can be tricky to manipulate in the dark, with gloves, especially as the scope rotates about the sky and the orientation of the buttons changes.
While computer control of the camera is very useful, the biggest advantage of the computer is the ability to use the same software to enhance the image by using a live image stacking feature. Stacking is done in the computer as it takes successive image frames from the camera, aligns them and combines them into a stack during a live viewing session. As each new frame is added to the last, the image improves as background noise is reduced and more detail begins to emerge. This provides an enhanced live view of Deep Sky Objects. To connect the video output of an analog camera to a computer a digital capture device is required. This takes the analog signal from the camera video output, digitizes it and sends it to the USB input of the camera where the software recognizes it for display, stacking or capture. While there are many of these devices out there it can often be a challenge to find one that works. The one I have used religiously without any issues is the Pinnacle Dazzle device. While more expensive than others it just works. It should be noted that digital cameras can also use a computer both for camera control and live stacking. In fact, when used with a computer a digital camera requires only one cable for both power, control and viewing compared to 3 for an analog camera. With the two suppliers of the CCDs used in analog cameras having decided to stop production in favor of CMOS sensors used in digital cameras there are just a few suppliers of analog cameras still available. You can still get the Xtreme and Xterminator from Mallincam and the much less expensive Revolution Imager II from a number of different suppliers. The Revolution Imager II does not come set up to use computer control but does come with a hand control which simulates the buttons on the back of the camera making it much easier to manipulate the OSD and also allows one to do this remotely. There are many options of older, but very good, analog cameras which can be found on the used camera market. In summary, you would choose an analog camera if you really do not want to use a computer or want the option to use it both without and with a computer. 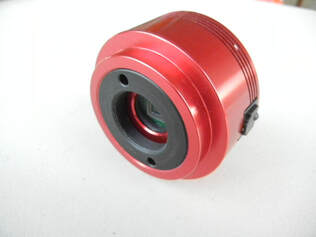
The Case for Digital
I recommend a digital camera for anyone just starting out. The era of analog cameras is waning and there will not be any new entries. On the other hand, new digital cameras become available as new CMOS sensors are released. The digital cameras available today provide much better images than any of the analog cameras. That is because digital cameras use sensors with many more pixels, between 1 and 61 Mpixels, compared to analog cameras which have less than 0.6Mpixels. Most digital cameras used for EAA have between 11 and 16 Mpixels . This combined with the fact that digital cameras use much smaller pixels than analog cameras, 3.75 to 4.6 microns compared to 8 to 9 microns, results in much higher resolution and a much larger field of view from digital cameras. In addition, the pixels in digital cameras are square whereas they are slightly rectangular in analog cameras. Between the size and shape of the pixels, digital cameras produce much rounder and pin point stars. Also, video sensors tend to produce a dark halo around stars resulting in a "raccoon eye" appearance for the stars viewed with a video camera. Putting this all together, the images from digital cameras are far superior and more natural looking than from the best analog cameras. Another big advantage of today's digital cameras is their extremely low read noise, on the order of 1.5 electrons. This helps with stacking since there is no disadvantage in taking many very short exposures to stack instead of few long exposures. This stacking strategy is very common as the short exposures reduce demands on the quality of the polar alignment and tracking precision. Shorter exposures also mean that field rotation, i.e. apparent rotation of the stars as the earth turns on its axis, is much less of an issue. This makes it much more practical to get by with an Alt-Az mount instead of requiring the use of a more expensive EQ mount. 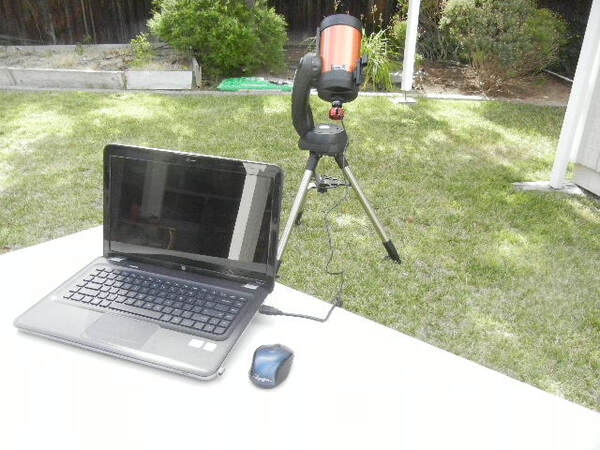
In contrast to analog cameras, digital cameras require only a single cable to connect to a computer. This USB cable provides power to the camera, allows the computer to control the camera settings and downloads the image from the camera for display and capture on the computer. Like analog cameras these digital cameras use less than 500mA of current. If the camera has a cooler for the sensor a separate power cable identical to that for an analog camera is necessary. Power from an AC transformer or DC battery capable of supplying 3-5A is required to handle the current load.
While the image from a digital camera is naturally displayed on the computer screen, it can be shared on a 2nd, larger monitor for viewing by a group such as for Public Outreach. With the right software the image can also be wireless displayed on a tablet as well. Of course, the additional monitor will require power as well. Many digital cameras come with their own proprietary software designed to provide camera control and include features to live stack images and even process images like in traditional astrophotography but on the fly while watching the image improve with time. Sharpcap is a more universal software program which works with most cameras either natively or through an ASCOM driver. It provides a seamless interface to the camera. The good thing about Sharpcap is that it is free, although there is a pay version which has lots of useful additional features. Sharpcap does have a steep learning curve, but it is written specifically for astronomy cameras so it is much more intuitive than the OSD menus of video cameras. Plus there is a well written manual and some on line tutorials to help one get started. Some of the proprietary software is easier to master quickly but may lack many of Sharpcap's added features. While Sharpcap will also work with analog cameras it cannot control the camera settings. The other important point to consider in choosing between analog and digital cameras is your future intention. If, like so many who practice EAA, you think you would like to try astrophotography in the future, you will want the higher image quality and wider field of view of a digital camera. There is no comparison between the best images taken with an analog camera and an average image taken with a digital camera. In fact, with a program like Sharpcap, one can do both live stacking for live viewing while also saving the individual images to be used later for traditional astrophotography processing. So, unless you need to go computerless, I strongly suggest getting a digital camera. Next issue of "Beginning EAA" will address Mounts.
You can find some of the products shown in this blog along with some others I would recommend in the links provided below. I have only listed products which I use myself or know to work well. Links are Amazon Associate links.
Revolution Imager - nice complete kit with analog camera, battery, display, cables, focal reducer, filter and adapter ZWO ASI224MC - this is the camera that started the switch to CMOS for EAA. Small sensor but highly capable and low cost ZWO ASI294MC Pro Cooled - while I have not used this one, it is the successor to the ASI1600MC which I do have and is widely popular now for EAA Starlight Xpress Lodestar X2C - while this is actually a guide camera, this is one of the first digital cameras used for EAA including by myself.
6 Comments
Steve Cohen
3/24/2022 06:05:40 pm
Hey. I found your site through a Google search. You seem to have knowledge in the areas I am questioning.
Reply
CURTIS V MACCHIONI
3/24/2022 07:44:17 pm
Steve,
Reply
Steve Cohen
3/26/2022 10:13:43 am
Thanks for your excellent advice and your explanation of why the setup that works for him might not work for me and the importance of focal length. Leave a Reply. |
Categories
All
Archives
January 2024
|
 RSS Feed