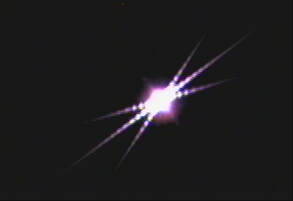
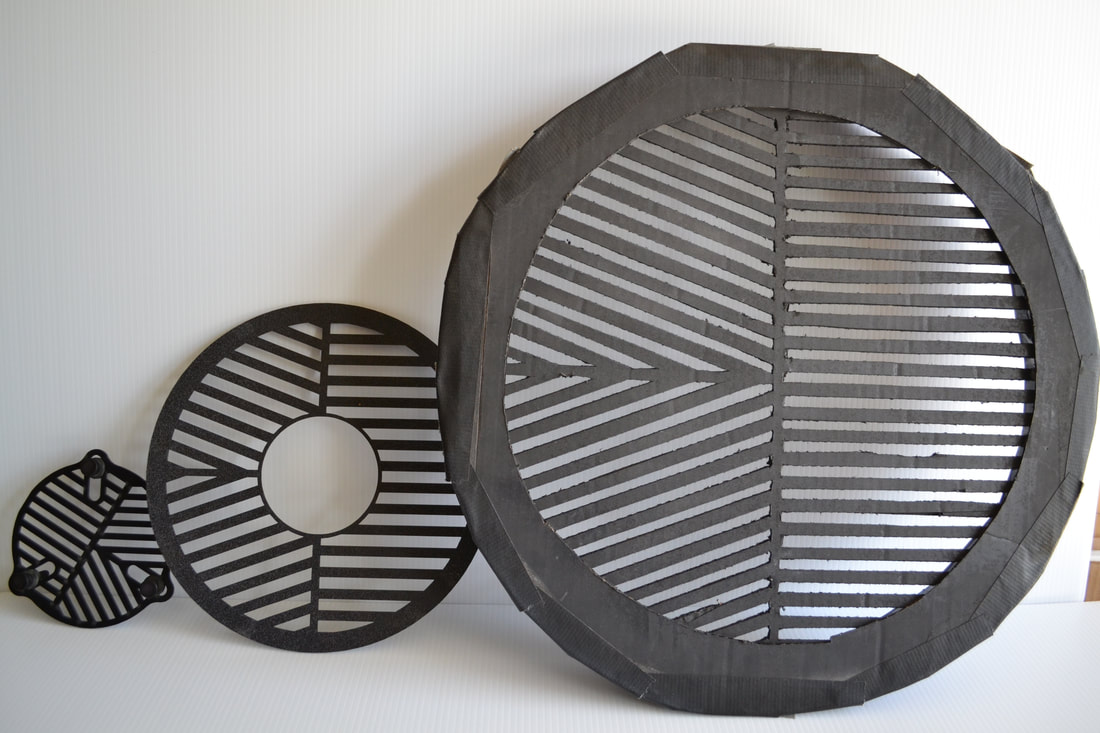
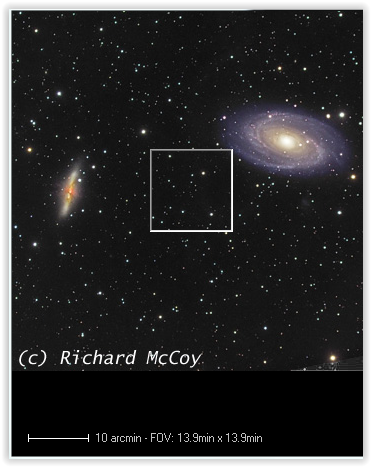
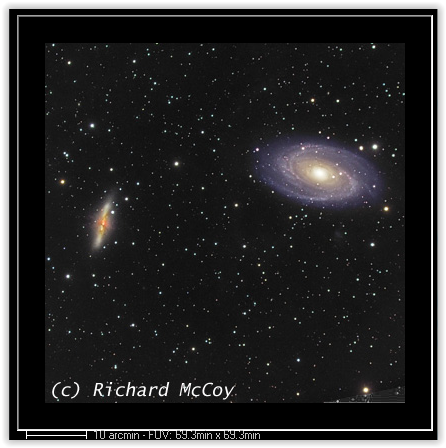
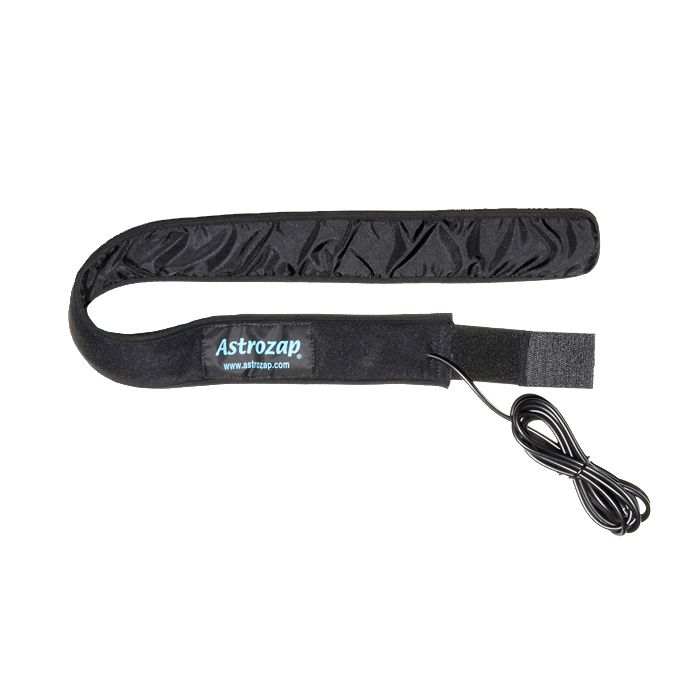
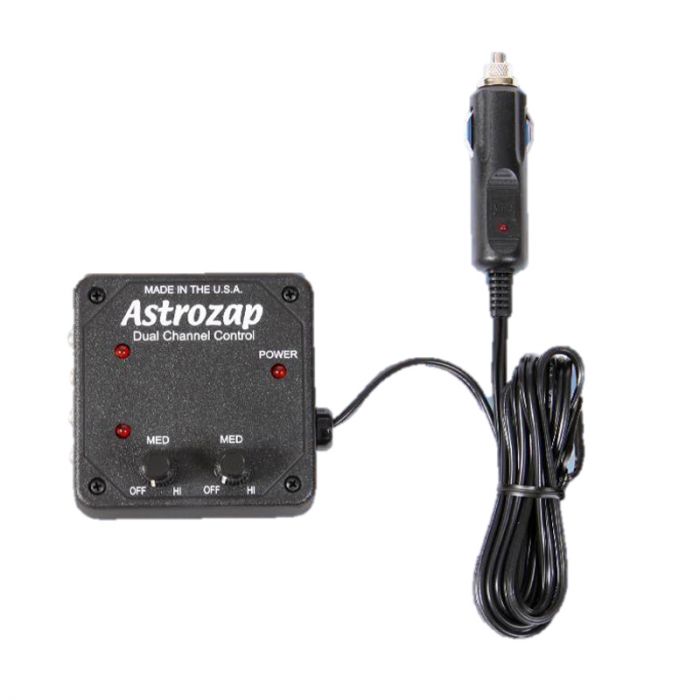
 In the first four installments of this series on EAA we have covered the big ticket items needed to get started including mounts, telescopes and cameras. Now we will look at the accessories most necessary for EAA. There are many possible accessories one could use to enhance the EAA experience, but in this installment we will discuss only the ones which are most essential to have right from the start. Of course, there can be differences of opinion as to what is essential and what is optional, but based upon my personal experience and what I see posted by other practitioners of EAA I feel fairly confident that you will find the items below extremely useful. Bahtinov Mask Before an EAA session can begin, even before the telescope can be aligned, it is necessary to focus the telescope. If you have a good view of a distant power pole, tree or similar object you can rough focus on that with an inexpensive wide field eyepiece (EP) like this 32mm or longer focal length example along with a cheap diagonal which may have already been included with your telescope. This is especially helpful if the telescope is way out of focus which can lead to a great deal of frustration. This was the case after I configured my SCT with my 2X Televue Powermate for the recent Jupiter-Saturn conjunction. I find it much harder to use my camera to get back into focus when I am initially far out of focus than using an EP. If you are like me with a backyard that is obstructed from such views you will have to use the moon when it is up, or work with the brightest star visible to make it easier to get close to focus. Once close to focus you will need to fine tune the focus to get a sharp image. If you are using imaging software which has a focus feature like FocusMax or Sharpcap you can use that to fine tune the focus. If not, the best option to assure sharp focus is a Bahtinov mask. Invented by the Russian amateur astrophotographer Pavel Bahtinov, the Bahtinov mask has become the go to tool for astronomers for quick, easy and accurate focusing. Usually constructed with pliable but sturdy plastic it consists of three grids designed to create three angled diffraction spikes for each bright object in the FOV when placed on the front objective of the telescope. Two of these spikes form an "X" while the third forms an "I" through the "X". As the focuser is racked in and out, the "I" shifts from one side to the other. When the "I" bisects the "X" in the center, best focus has been achieved. You can read more about how this works and view a simulation on this Wikipedia page. Once focused, the Bahtinov mask must be removed. If your telescope needs to be re-focused throughout the night, you will have to repeat the procedure each time which is really the only disadvantage of this technique compared to software focusing. The Bahtinov mask must be sized for the particular OTA. Some versions like the smaller one shown in the image above are adjustable and can fit several different telescope sizes. Masks for SCTs typically have a hole in the center to accommodate the secondary mirror or a Hyperstar adapter. The ones from Farpoint are fairly inexpensive, work well and are the ones I typically use. Some telescope manufacturers like Williams optics now incorporate the Bahtinov mask into the dew cover for their 81mm doublets. One can even make their own masks like the cardboard one I made for my 14" SCT shown above. 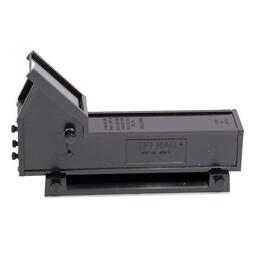 Telrad Unity Finder Telrad Unity Finder Finder Scope Once focused it is time to align the telescope. Most, but not all, telescopes come with a finderscope, either an 8 or 9 x 50. That is a magnification of 8 or 9 and a 50mm lens. I find that it is much easier to use a Unity Finder than the typical 8 or 9 x 50 finder scope. If using a telescope like my 9.25" SCT or larger I use a Telrad Unity Finder which uses a red LED to project 3 concentric circles onto a clear plastic screen. The circles cover 1/2, 2 and 4 degree FOVs. The LED can be dimmed and is powered by 2 AA batteries. By sighting through the circles I can see the alignment stars through the clear screen with the red circles superimposed as I adjust the mount to bring the intended star into the FOV of the telescope. For me, this is faster and usually less confusing compared to looking through an 8X or 9X finder with a greatly magnified image and many more stars. After all, the alignment stars are most always naked eye stars and the final alignment of the mount will use the camera view through the telescope and not the finder. An optional dew shield and optional dew heater are available to prevent dew formation on the clear screen. Like any finder, the Telrad must first be aligned to the telescope which is best done at night with a bright star. The moon can be used for rough alignment followed by a star for more precise alignment. The Telrad attaches to a base with two thumb screws for easy removal for travel. The base attaches to the telescope using supplied double sided tape. Another advantage of the Telrad is that it is less expensive than a typical optical finder scope. Rigel makes a similar unity finder with concentric circles but with a smaller base and a higher stance off the OTA compared to the Telrad. It is powered with a lithium battery and has an adjustable led intensity and a pulse mode as well. I use this one on my 80mm refractor as the Telrad is to large for that size telescope. Other options are the Red Dot finders which are also unity finders which project a red LED as a dot on a clear plastic window. Simply look through the window and adjust the mount until the red dot is on the star to align the mount. I use these smaller finders on my 6" SCT. The one thing to keep in mind with all of these unity finders is that if you view through the finder from an angle instead of from directly behind the star will appear to move of the red dot which will lead to an offset in the alignment. This is not difficult to manage but if you want the state of the art in unity finders, Tele Vue makes a version where the star remains fixed even when viewed from 2 feet off axis. The catch is that instead of costing under $50 the Tele Vue Star Beam costs $347. 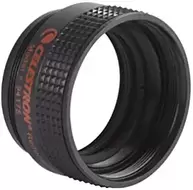 Celestron f/6.3 focal reducer/corrector Celestron f/6.3 focal reducer/corrector Focal Reducer One of the most common and useful accessories for EAA is the focal reducer. Unless your telescope is already at f/6 or faster like many Newtonians, you will find that a focal reducer is an essential tool to make EAA more enjoyable. A focal reducer does two important things. First, it increases the field of view (FOV) of the optical system. A large FOV makes it much easier to find very dim objects, especially with a small sensor and a rough GoTo alignment. In addition, a large FOV is necessary to fit large DSOs like M33 fully into the camera frame. Likewise, a focal reducer can be helpful for fitting multiple smaller DSOs into the frame. While full screen views of the galaxies M81 and M82 can be wonderful in their own right, adding a focal reducer to the optical path to bring both galaxies into a single FOV which gives an entirely different perspective on the these two interesting but very different galaxies. And there really is no other way to appreciate galaxy clusters like the Virgo cluster without a focal reducer to capture them with the necessary large FOV. As we discussed in the third article in this series, "Choosing a Telescope for EAA" a focal reducer has the effect of reducing the native focal length and focal ratio of a telescope. Since the FOV is inversely proportional to the focal length, an f/5 focal reducer will decrease the focal length of the telescope by a factor of two Focal Length with f/5 reducer = Native Focal Length x 0.5 which conversely increases the FOV by a factor of two. The second important function of a focal reducer is to increase the speed of the telescope so that images can be captured and viewed with much shorter exposures. For instance, the Celestron f/6.3 focal reducer combined with an f/10 SCT will reduce the focal ratio to f/6.3. Since the speed of a telescope is proportional to the inverse of the focal ratio squared, the X6.3 focal reducer speeds up the telescope by 2.5X Telescope Speed = (10/6.3)^2 = 2.52 So the exposure for a given object can be reduced by a factor of 2.5 to provide an equivalent brightness view compared to the one at f/10. Of course, the trade-off is the reduction in the magnification resulting in an image which appears equivalently smaller. In other words, the same photons are captured but concentrated into a smaller number of pixels in the camera which both reduces the exposure and reduces the size of the object. This is demonstrated in the images below using the free analysis software CCDCalc to show the FOV for an ASI533 camera and an 11" SCT at its native f/10 and using a Hyperstar lens to reduce the focal ratio all the way down to f/2. As illustrated by the white rectangles overlaying the images of M81/M82 below, the FOV is sufficient at f/10 to capture only M81 while at f/2 both galaxies fit nicely in the FOV. Focal reducers can be found with a range of focal reduction values from ~0.8X to 0.5X. Many focal reducers combine focal reduction with field flattening to bring the entire field into focus at the same point resulting in round stars all the way to the edge of the FOV. The popular Celestron f/6.3 focal reducer/corrector has a reduction factor of 0.63X and is designed to work with non-Edge SCTs, as is the very similar Meade f/6.3. These provide focal reduction, correct for coma and also flatten the field of view. Celestron has a separate 0.7X focal reducer for its Edge series of SCTs. Focal reducers for refractors generally come in 0.8X and 0.75X versions and may or may not also provide a flat field. In general, focal reducers are available from telescope makers like Televue, Explore Scientific, Sky Watcher, Orion, etc. and are optimized for their specific telescopes. Examples are the Celestron f/6.3 for their non-Edge SCTS, the TeleVue 0.8X reducer/flattener for their 102mm refractor, The Sky-Watcher 0.77X reducer/field flattener for their Esprit 120mm refractor, and others for most every brand of telescope. In addition to these telescope specific reducers, there are a number of generic focal reducers which can be used for most any telescope from the likes of Optec, Starizona, Baader Planetarium, etc. For modest budgets there are many different 0.5X focal reducers in the 1.25" and 2" formats from, GSO, Antares, Svbony and others. These use an inexpensive single lens commonly found in binoculars and work very well for cameras with small sensors, less than 10mm. On larger cameras one may notice distortions and aberrations at the edge of the FOV with these inexpensive reducers. For focal reducers to achieve the stated focal reduction without causing aberrations or distortions in the image they must be positioned at the manufacturer's designed spacing from the camera's image plane. This distance varies by design and is usually measured from the base of the mounting threads on the back of the focal reducer to the camera sensor. In some cases it is measured from the center of the rear lens of the focal reducer to the camera sensor. For example, the ideal spacing is 105mm for the Celestron f/6.3, 146mm for the Celestron Edge f/7 for the 9.25", 11" and 14" models but only 133.35mm for the 8" Edge. Focal reducers for refractors are most commonly designed for a spacing of 55mm. Typically, to get the correct reduction factor and avoid optical aberrations, the spacing must be correct within 1 to 2mm so the proper set of spacers will be required. It is important to note that a focal reducer will move the image plane closer to the focuser so it is critical to make certain that the focuser has sufficient in focus travel to accommodate this. Also, if the focal reducer is spaced further from the imaging plane the reduction factor increases so the FOV gets even larger. However, in most cases this will cause optical aberrations and vignetting which may or may not offend the user. On the other hand, if the focal reducer is spaced closer to the imaging plane the reduction factor the reduction factor decreases which does not cause vignetting issues. For those willing to accept some amount of vignetting and image distortion near the field edge, two focal reducers can be combined to achieve an even greater reduction and faster imaging platform. An excellent overview of focal reducers is available on the Agena Astro web site here. Dew Control Unless you only observe from a desert, you will eventually encounter dew buildup on your optics. The first line of defense is a dew shield which attaches to the front of the telescope and keeps the corrector or objective from forming dew in moderate dew conditions. Fortunately refractors come with a dew shield as part of their design. Many retract for storage and extend when in use. Newtonians are less susceptible to dew formation on the primary mirror since it sits well back in the tube which acts like an extra long dew shield. The main concern for Newtonians is dew on the secondary which is why many are designed with the secondary set back inside the tube allowing it to act as a fixed dew shield like on many refractors. If you have an SCT you will need a dew shield. These are available from many manufacturers and come either as either a flexible plastic or rigid aluminum cylinder. These are usually felt lined to prevent stray light from reflecting of the sides and into the telescope. As such, these dew shields serve the secondary purpose of deflecting any off axis light from interfering with the image. The flexible version is held in cylindrical form with velcro attached to one side which means it can be flattened for storage or transport. Both the flexible and rigid type also come in versions with notches to fit around dovetails and with additional notches for camera cables when using a Hyperstar lens. The aluminum versions add more weight at the front end of the SCT which will have to be balanced by moving the SCT back in the mount saddle. When the dew shield is not sufficient to prevent condensation of water on the optical surfaces active measures are required and this is typically achieved with a dew strap and dew heater. Dew straps come in sizes to fit most every telescope. Simply wrap the dew strap around the outside of the telescope near the optical element at the front of the telescope exposed to dew such as the objective of a refractor or the corrector plate of an SCT and run the included wires down to a dew controller for power. The dew strap has a series of resistors which produce a mild heat at the surface of the telescope to keep the temperature near the glass surface above the dew point. A good practice is to add a layer of reflectix to top of the dew strap to minimize the heat loss to the air which will help to minimize the power required for the dew heater. Reflectix can be found at your local Home Depot or Lowes hardware stores. There are many dew controller options. These all come with multiple channels to power two to four separate dew straps. The outputs can be adjusted from 0 to 100%. I use the Astrozap which has four channels, controlled in pairs. The Thousand Oaks model also has four channels but each channel can be independently controlled. I have never had the need for more than two channels so the Astrozap has worked well for me. A nice feature of the Thousand Oaks controller is the addition of a 12V power outlet to provide dc power to an additional accessory. I recently purchased a Pegasus Astro Pocket Powerbox Advanced as a power and USB hub for my setup and it has 2 independently controlled dew control channels which can be adjusted in the included software. The nice feature of this controller is that it comes with a temperature and humidity sensor which can be used to automatically control the dew controller settings. Another option in dew control is a dew shield with built in dew heater strap. I have used these for my Celestron 14" and Celestron 9.25" SCTs but prefer the stand alone dew strap and separate dew shield. Astrozap dew strap and dual channel dew controller 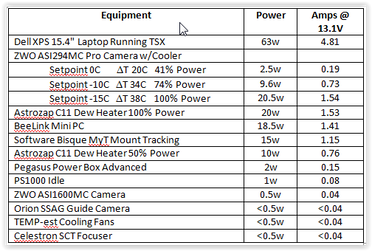 Power I have posted a comprehensive review of power options which addresses power needs, distribution of the power from the source to the equipment and the many different power source option pros and cons. It can be found here so I will not repeat all of that in this blog article. If possible it is best to measure the power needed by using a watt meter or a digital multimeter, DMM. A watt meter is easiest as it measures both current and voltage at the same time. A little more effort is required to measure current and voltage with a DMM as these need to be measured one at a time or at the same time with two DMMs. On the other hand, a reasonable estimate of power needs can be made from the data in the table shown below. These are actual measurements of the power used by each device in my own setup. An EAA setup does not need a guider and does not need a cooled camera although both can be used. Most cameras will use less than 0.5W of power and a typical tracking mount can be expected to consume ~10W. The biggest power hogs are laptops and dew heaters. A relatively simple EAA setup with camera, mount, power/USB hub, and dew heater should need between 15W and 30W not counting the laptop. Add ~10W if you use a cooled camera as you do not need to run the camera cooler at full power for EAA. There are so many power supply options that it can be confusing for many. The cheapest upfront option is an AGM battery. These are available in capacities of 50Ah for ~$100 and 100Ah for ~$200. Keep in mind that AGMs should not be discharged more than 50% to 80% of their capacity depending upon the manufacturer's specifications. Exceeding this will cause permanent damage and a shortened life. Many prefer to use only 50% of the capacity to extend the life of an AGM battery. For those with the long term view, an AGM is not the cheapest option given its depth of discharge (DOD) constraint. LiFePO4 batteries are much more cost effective when viewed over the long term, although their upfront cost will be much higher. LiFePO4 are used extensively as replacements for AGM batteries in the RV and boating industries. These batteries have an internal battery management system (BMS) which allows for a 100% DOD without damaging the battery. The trick is the BMS holds some power in reserve when it shuts down so the lithium cells have not actually be fully depleted. For those who need a large capacity LiFePO4, something like the Battleborn battery which is manufactured in Sparks Nevada is a good option. For lesser power needs, the Talentcell line of small capacity batteries tend to be more cost effective than the astronomy specific Celestron or Meade batteries. For those who need more than just a dc power source, the all-in-one solar generators from companies like Jackery and Maxoak Bluetti are solar re-charge ready, have a built in pure sine wave inverter which can be used to power any AC devices like a laptop, have several different USB type charging ports, meters, a display and more. These use Lithium Nickel Manganese Cobalt Oxide, commonly abbreviated as NMC. NMC batteries have a higher energy density per unit weight than LiFePO4 and are used in electric cars, ebikes, power tools, etc. The all-in-ones come with a range of capacities from 167Wh to over 2400Wh. and are the most expensive options out there. But, they are multi-purpose and make good emergency power backups at home since they can be safely operated inside the house unlike a gas generator. So, these are the accessories that I consider essential for EAA. One can certainly start without them, but I believe these will be the most helpful accessories one could buy and the sooner you have them the better your EAA sessions will be. There are certainly many other accessories which people find helpful but these can be added in time. Amazon and OPT links are Associate/Affiliate links from which I can earn commissions at not cost to you.
1 Comment
Russell Stewart
3/31/2021 07:52:05 pm
excellent information, you don’t mention any polar alignment hardware though.
Reply
Leave a Reply. |
Categories
All
Archives
January 2024
|

 RSS Feed